How to Make Flappy Bird Game on Scratch? – A Step-By-Step Tutorial On Scratch Games
- Pallabi Mohanty |
- June 12, 2024
Updated By
Reviewed By
Create Flappy Bird: Scratch games are visually fun and interactive ways of learning coding and game development, especially for children between the ages of 8 to 16. A Catcher game on Scratch can be of different types depending on the sprite’s movement, objective, and rewards. In this blog, we will discuss how to make a flappy bird game on Scratch.
Looking to learn Scratch coding? Explore Wiingy’s Online Scratch Coding Classes For Kids to learn from top Scratch coding experts.
What is a Flappy bird game on Scratch?
In the Flappy Bird game on Scratch, you build moving pillars, control the bird’s movement with the space key, and every time the bird files through the moving pillars, you get points. There are five steps involved in making a Flappy Bird game, and they are listed below:
- Make a flappy motion sprite [bird]
- Add the pillars sprite [that the bird will fly through]
- Make the pillars move across the screen
- Make a background [end of the game]
- Keep score
This is Chapter 2.2 in the
Scratch Game Tutorial
How to make a Flappy bird game on Scratch in 9 minutes?
The detailed step-by-step process involved in making a Flappy bird game on Scratch is explained below:
Step 1: Make a Flappy motion sprite [bird]
The detailed steps on how to create a flappy bird game on Scratch are explained below;
The first step toward creating the flappy bird game on Scratch is to make the object move. For that, we will have to choose the right sprite, and the detailed steps on how to do this are outlined below:
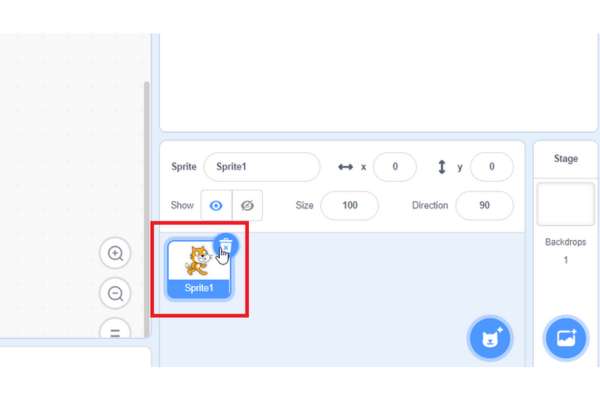
- Delete the Cat sprite
- Click on the delete icon.
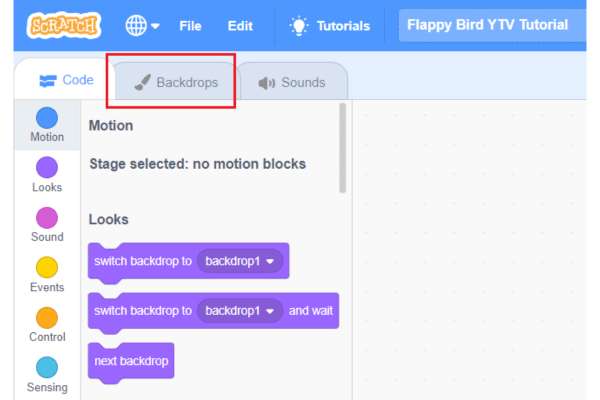
- Let’s make a backdrop, click on “Backdrops”
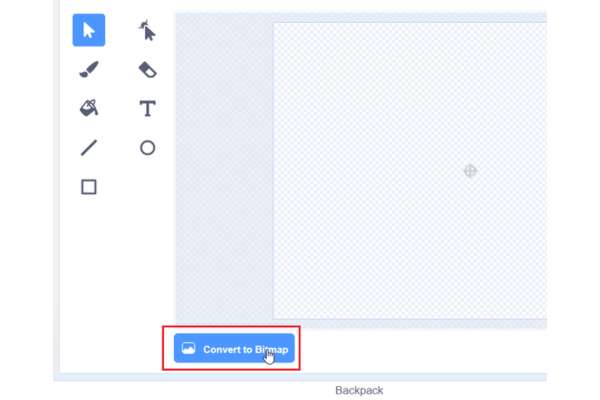
- Click on the “Convert to Bitmap”
- Click on the “fill” from the paint tool.
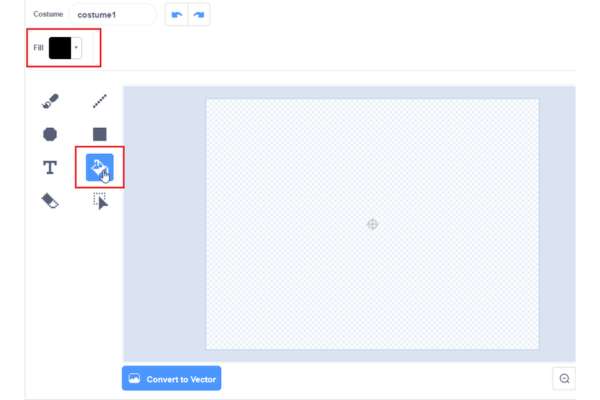
- Click on “Fill” and select the color.
- Select the color by dragging the “Color”, “Saturation” and “Brightness” sliders as shown below.
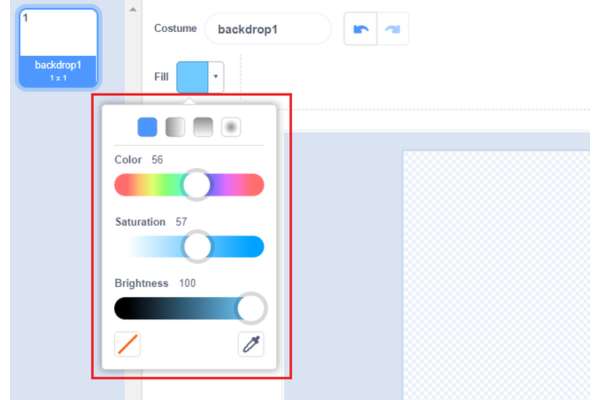
- Click on the paint area.
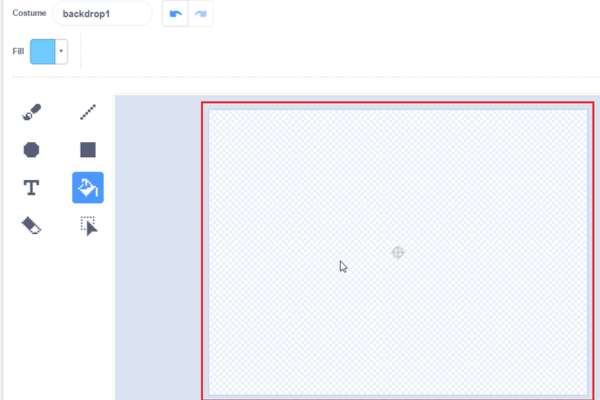
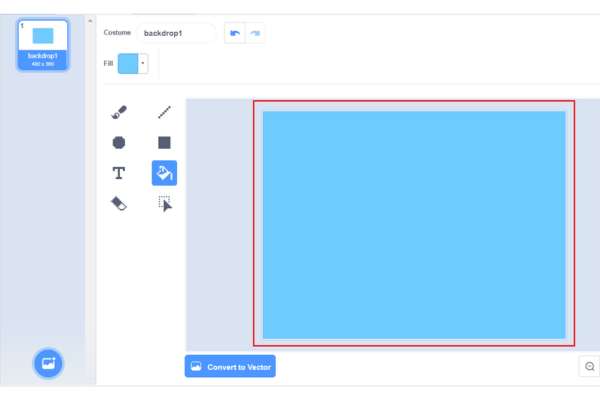
- Backdrop color added.
- Click on the “Code”
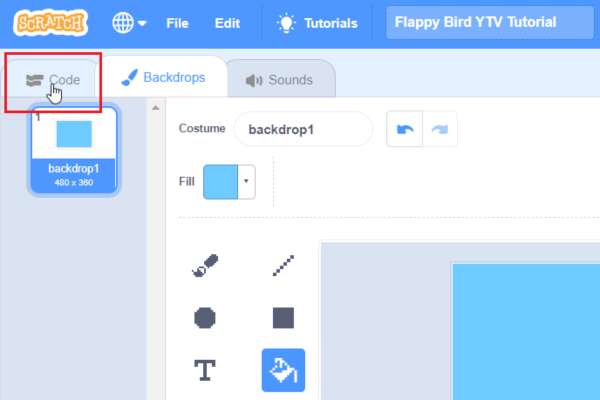
- Pick a character for the game. Let’s add a bird sprite.
- Click here to download the bird sprite.
- Click on the “Download”.
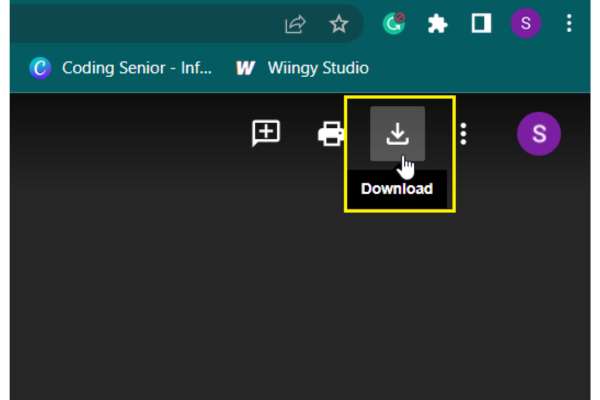
- Bird sprite (image) downloaded.
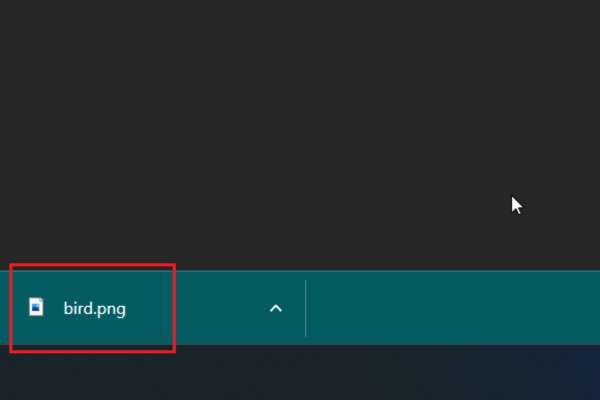
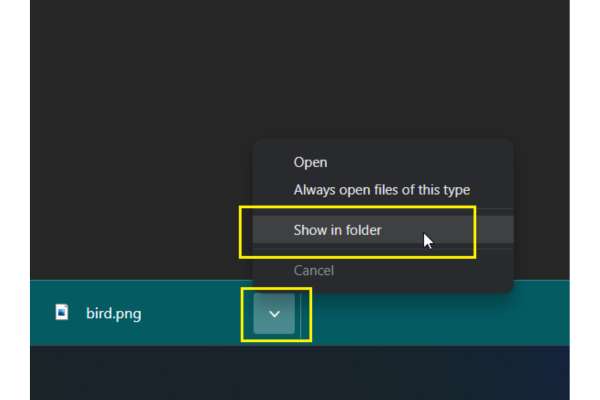
- Click to open the saved folder of bird sprite.
- Click on the “Show in folder”
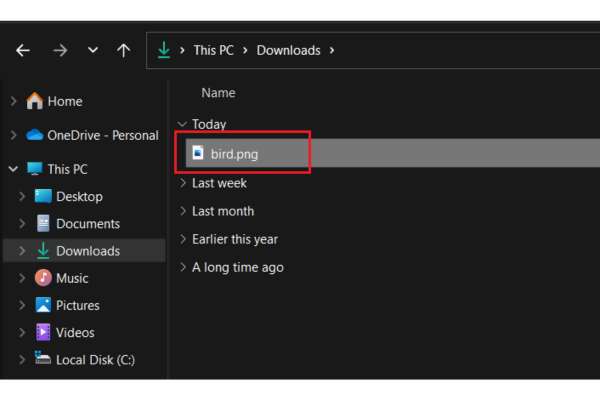
- Your sprite is saved in the “Downloads” directory; It may differ for you.
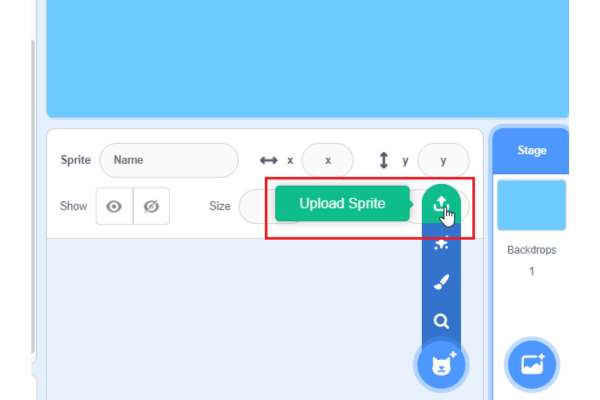
- Now, upload the sprite to the game.
- Click on the “Upload Sprite”
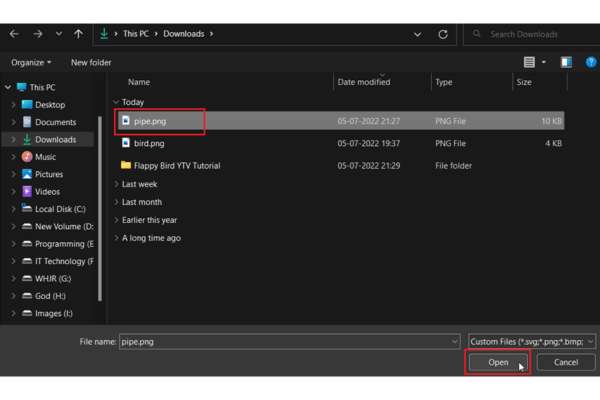
- Search bird sprite in your downloads directory and click on it.
- Then click on “Open”
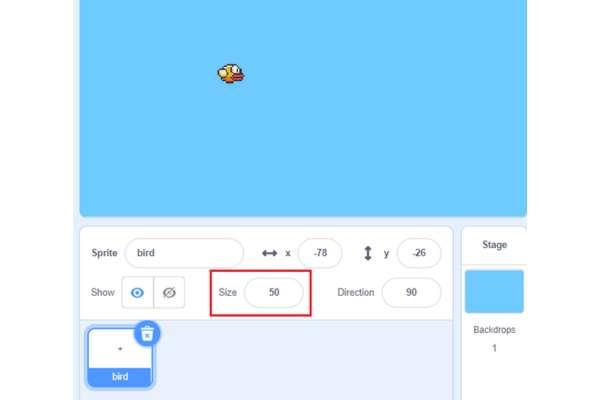
- The bird sprite was added to the game. Change the size of the bird sprite to make sure the bird is small enough to fly through the pillars.
- Change the size to 50
- Make the bird the “flappy” motion. In Scratch, you can move the sprite up & down words by changing the Y value.
- Drag & drop the “change y by” block and change the number.
- Click on it as shown below. The bird can move upwards.

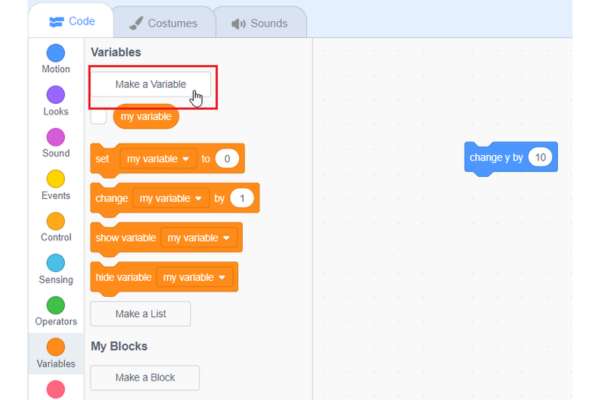
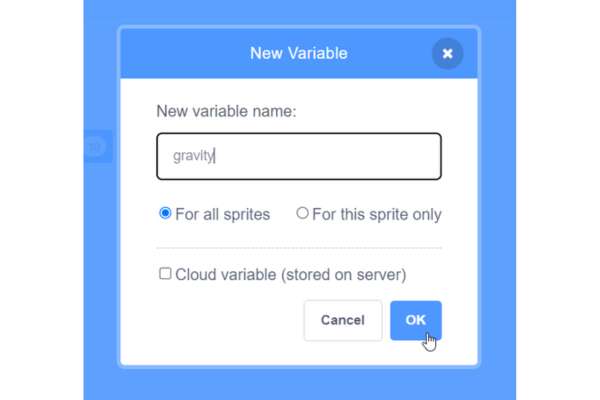
- Create a variable to keep track of the Y position of the bird. And we will call it gravity.
- Click on “Variables” and click on “Make a Variable”.
- Name your variable
- Click on the “Ok”
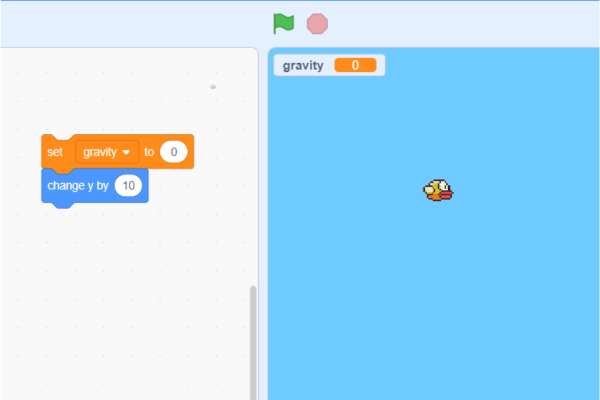
- Drag & drop the “set gravity to” block as shown below and set the number zero.
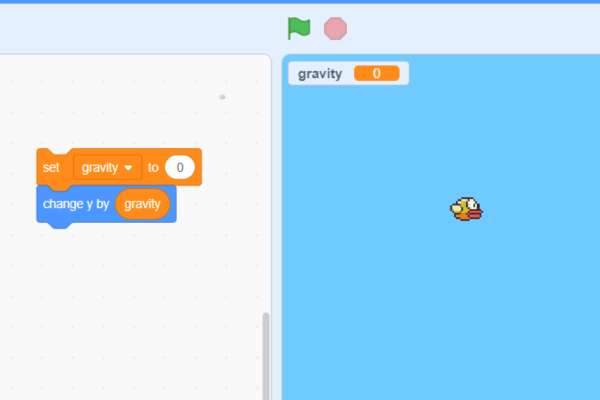
- From “Variables” drag the “gravity” variable & drop it to the “change y by” block.
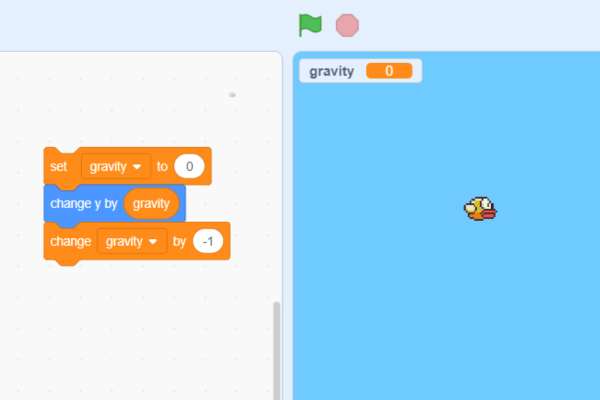
- Make the bird fall down. So change the value of gravity.
- Drag & drop the “change gravity by” block and set the value to negative as shown below.
- Drag & drop a forever loop as shown below.
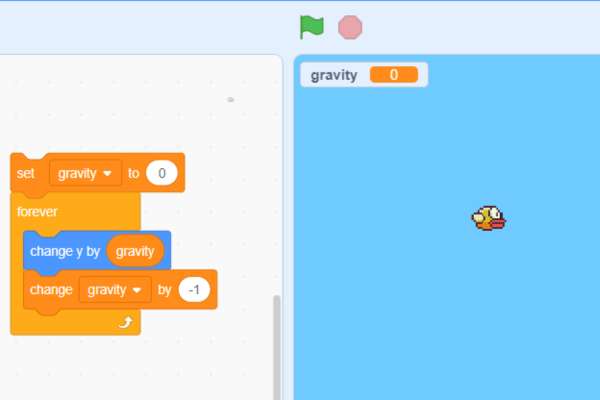
- Set the bird’s position when the game starts.
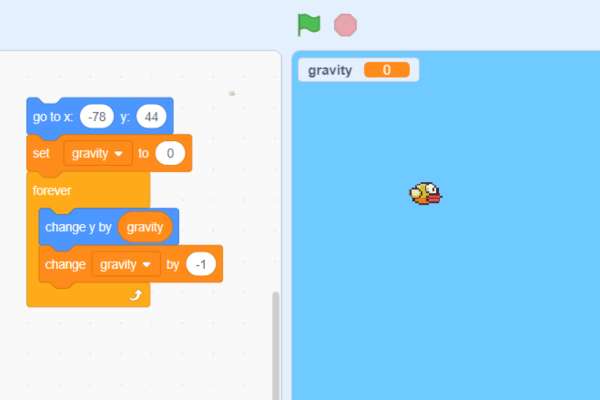
- Drag & drop the “when green flag clicked” block on top as shown below.
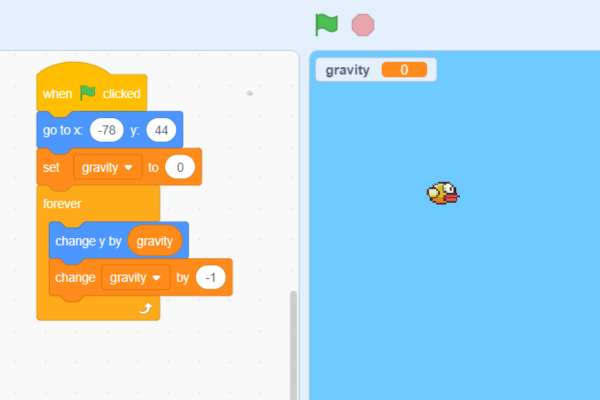
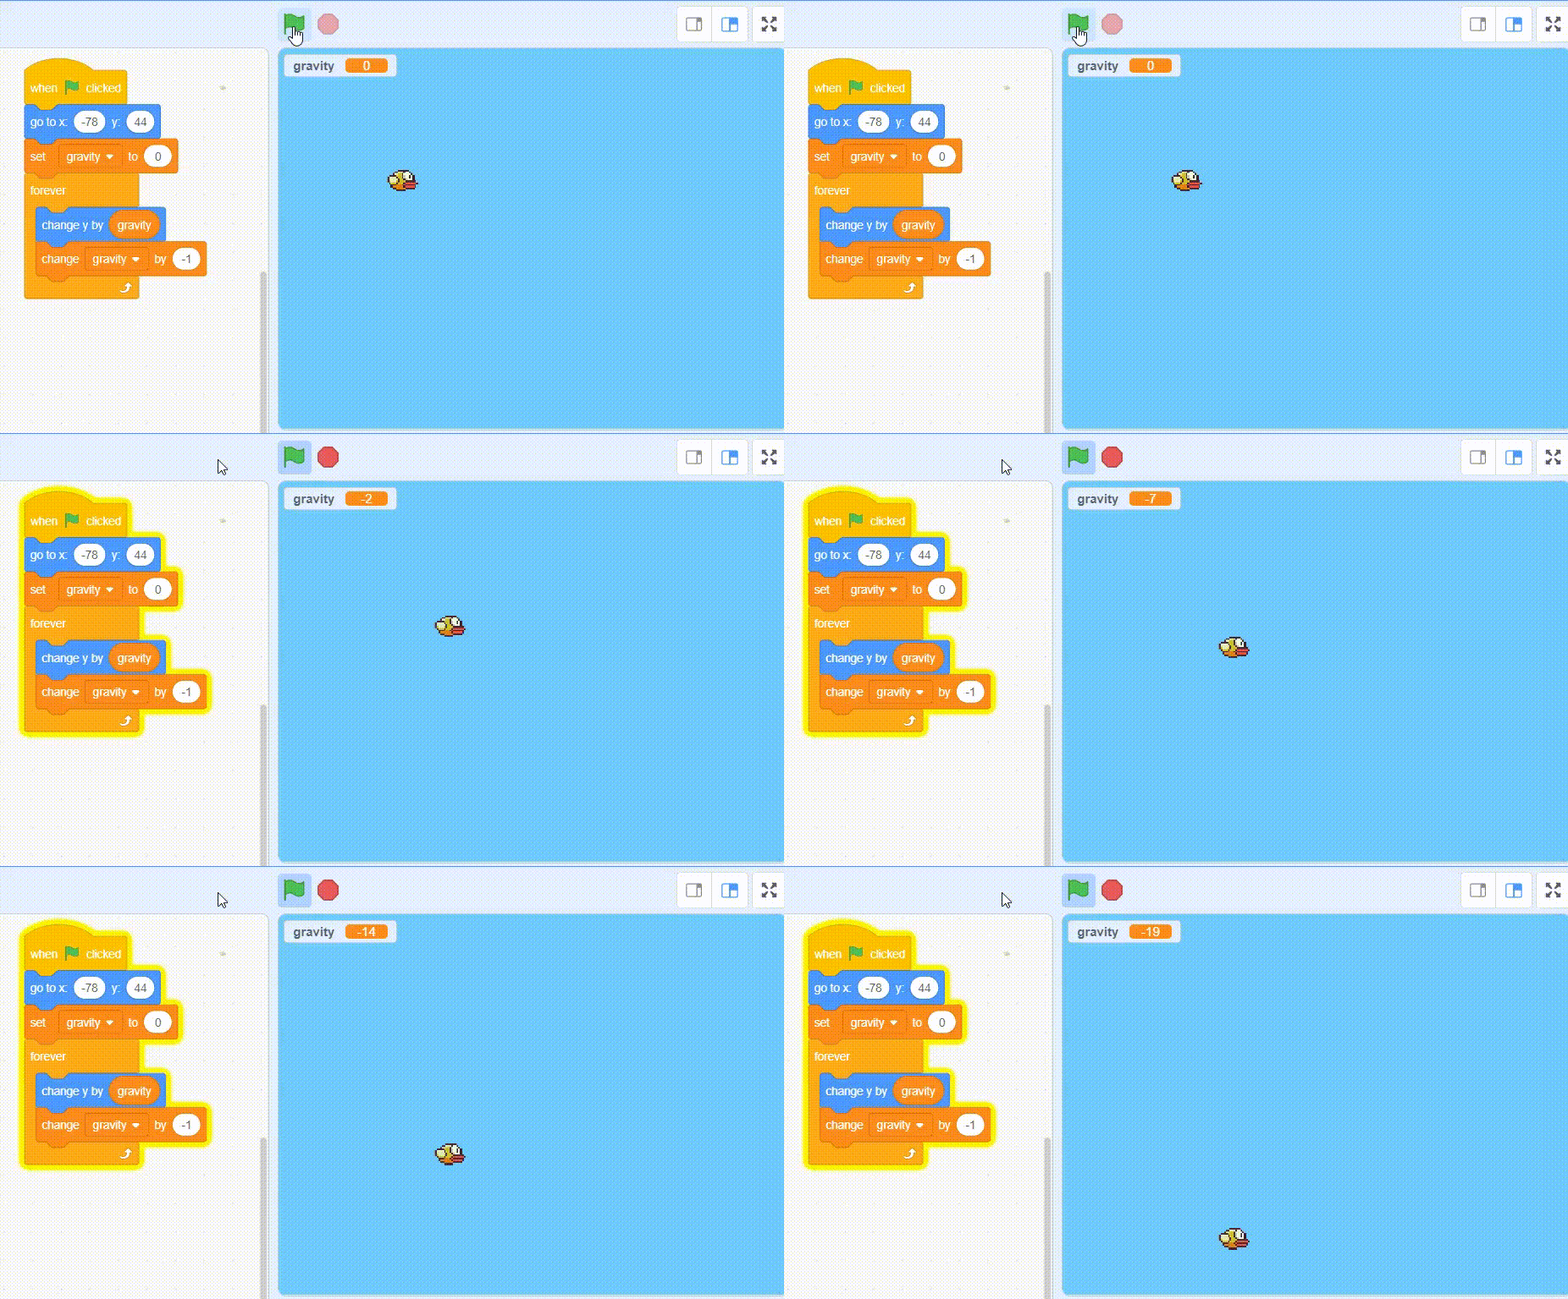
- Click on the “green flag”.
- The bird is falling down.
- The flappy motion is controlled by the space bar: each time you hit the space bar the bird goes up. We want the condition for the if statement to be the Sensing block “when space key pressed”.
- Drag & drop the “if-then” and “key space pressed? then” block as shown below.
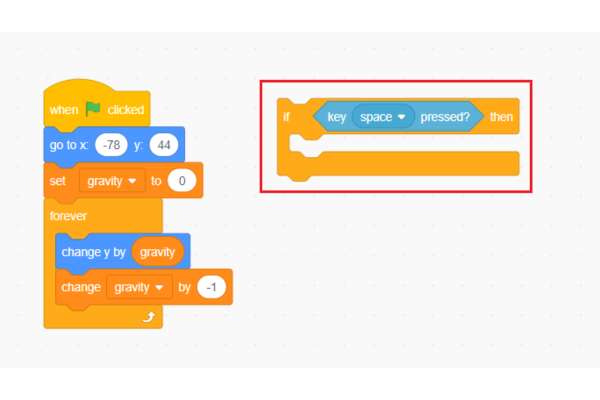
- We want the bird to go up. Change the gravity variable value to a positive number.
- Drag & drop the “set gravity to” block and change its value by 10; you can choose any.
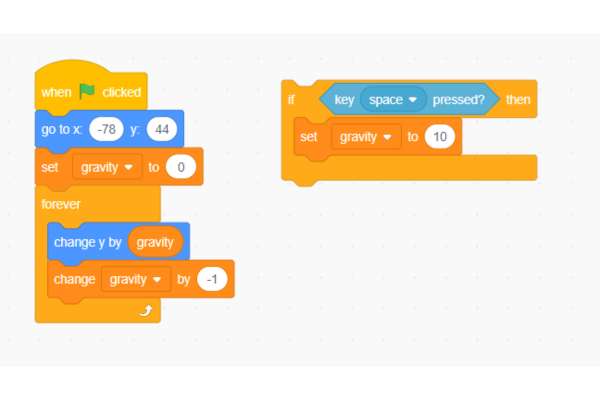
- To check this condition, again and again, drag & drop the forever loop as shown below.
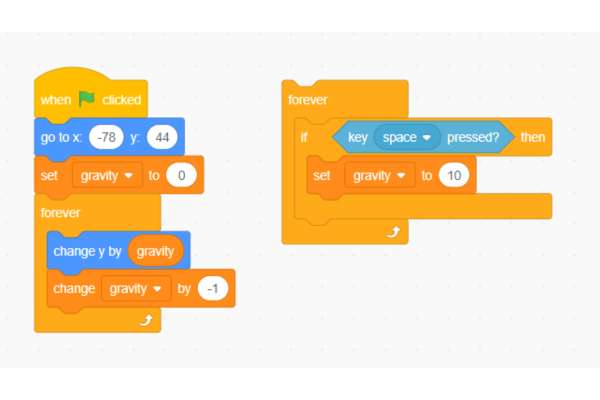
- Drag & drop the “when green flag clicked” block on top as shown below.
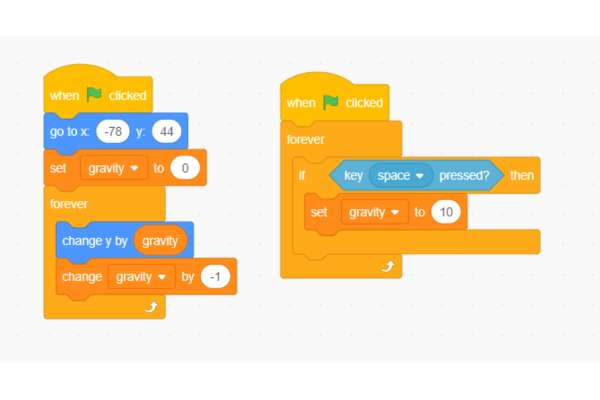
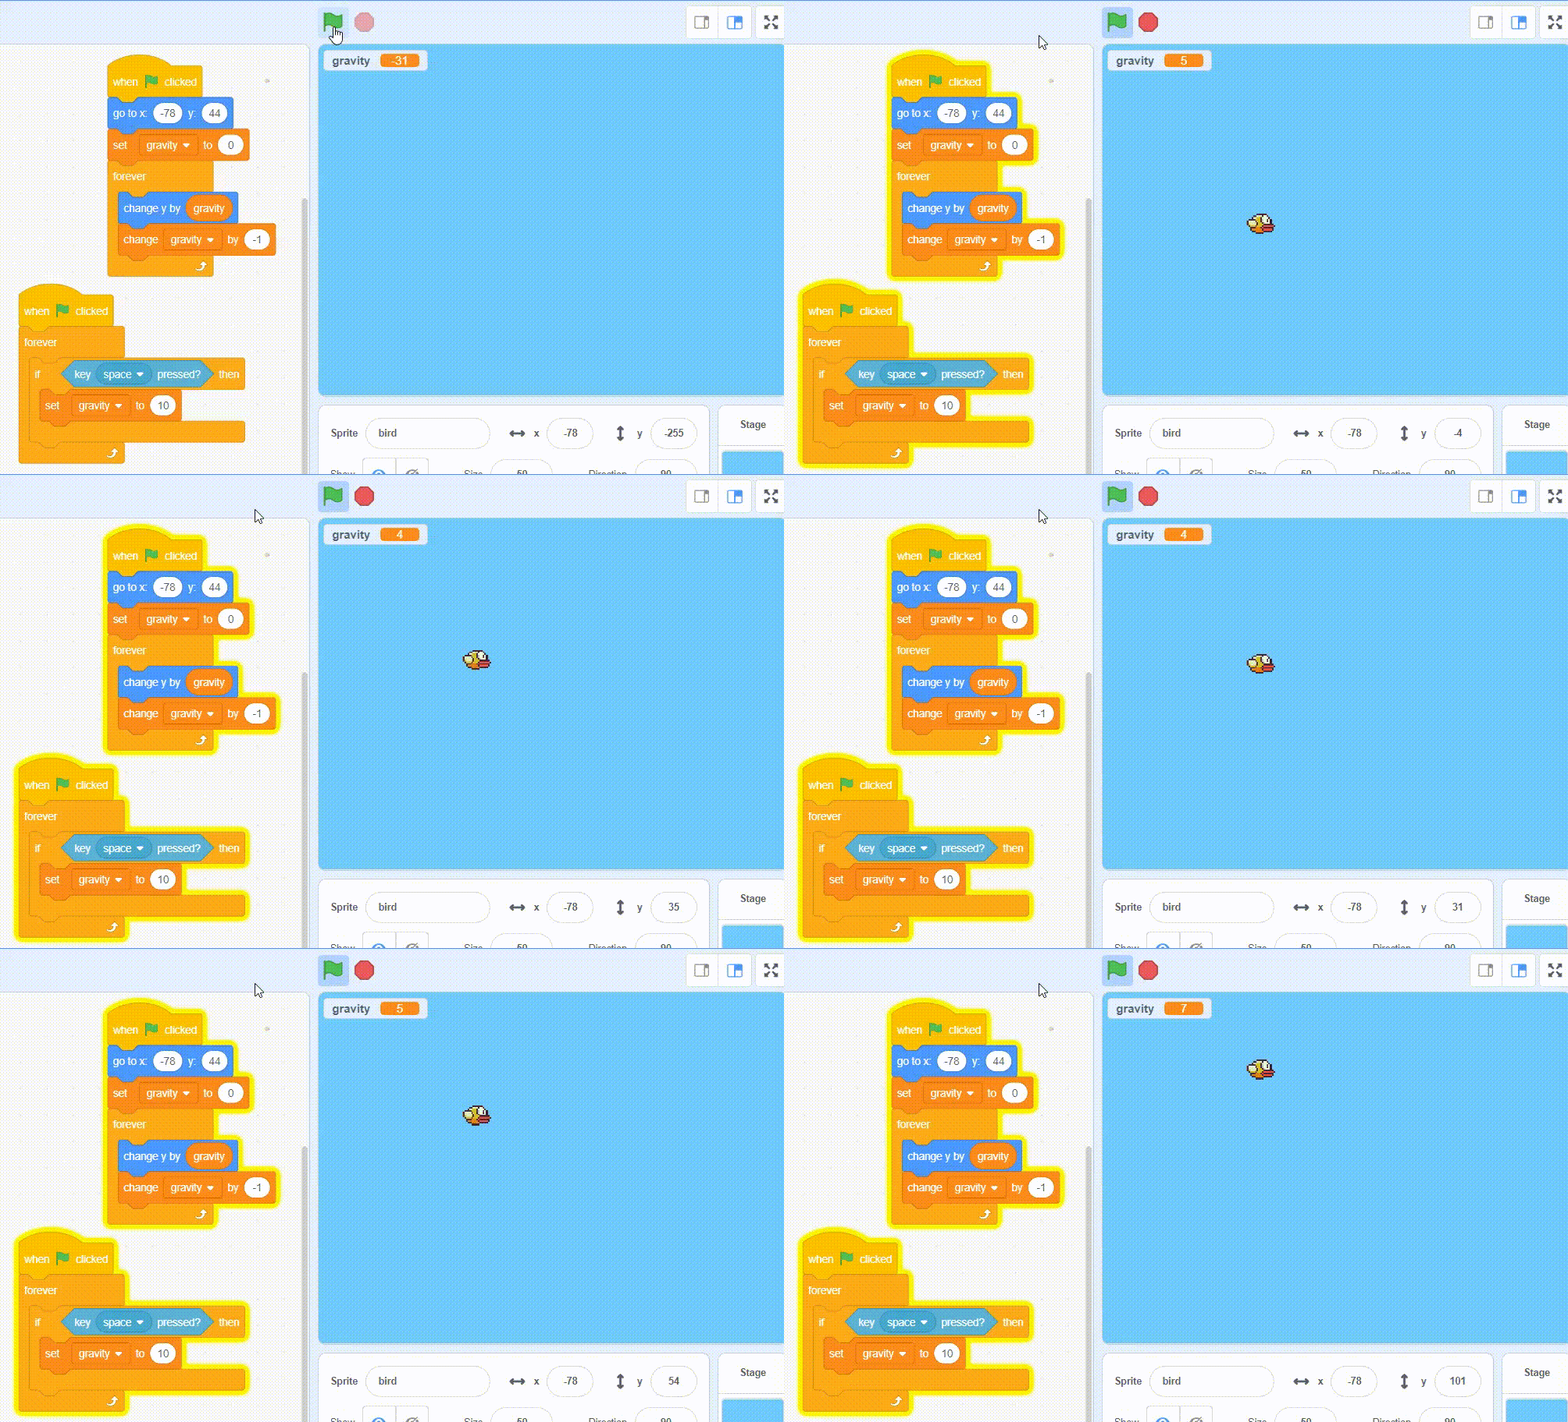
- Click on the “green flag”.
- The bird go up when the space bar key is pressed.
- But if you keep pressing the space bar key bird keeps going upwards and overshoots the scratch stage area.
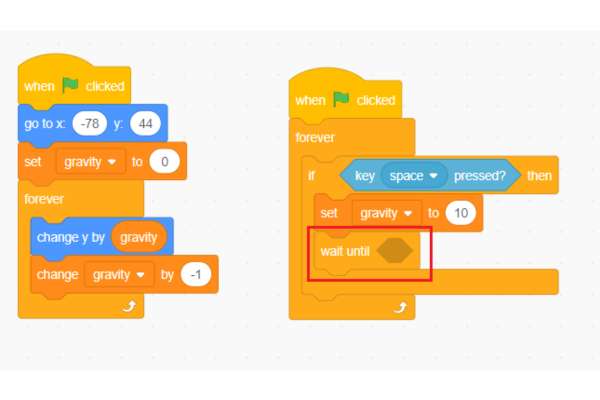
- Add a conditional statement to avoid this.
- Write a conditional statement to check whether the “space key” is not pressed.
- Drag & drop the “wait until” block as shown below.
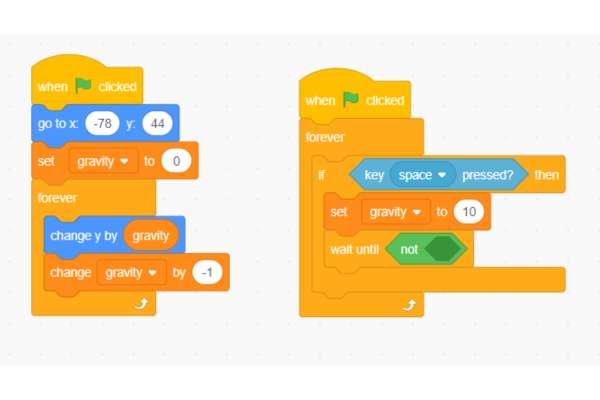
- Drag & drop the “not” operator to the “wait until” block as shown below.
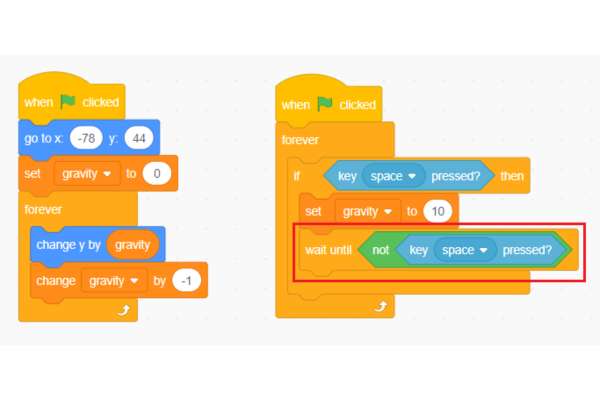
- Drag & drop the “key space pressed” block to the “not” block as shown below.
- Click on the “green flag”.
- If you keep pressing the “Space key” the bird is not overshooting the scratch stage.

Step 2: Add the pillars sprite [the bird will fly through]
- Create the pillars that the bird will fly through.
- Click here to download the pipe sprite.
- Click on the “Show in folder”
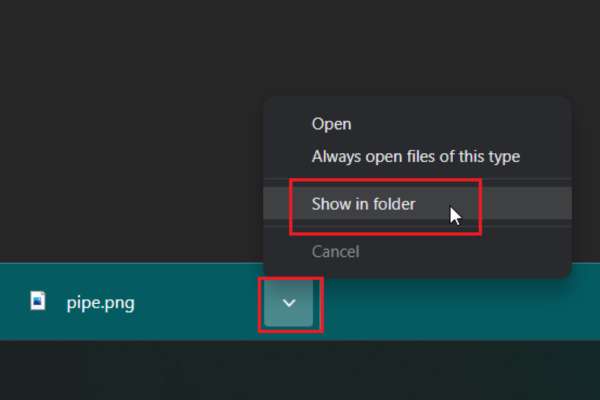
- Now, upload the pipe sprite.
- Click on the “Upload Sprite”
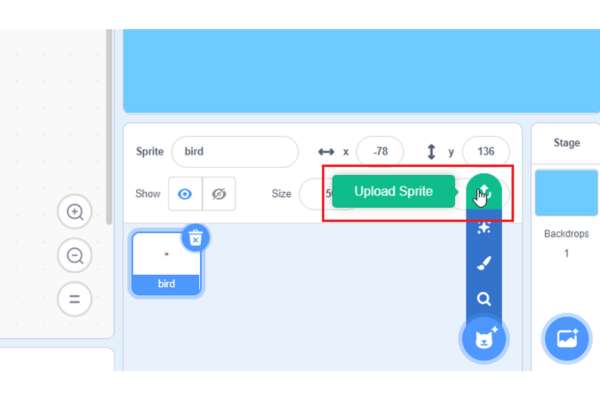
- Search your downloaded pipe sprite in your download directory.
- Click on it and click on the “Open”.
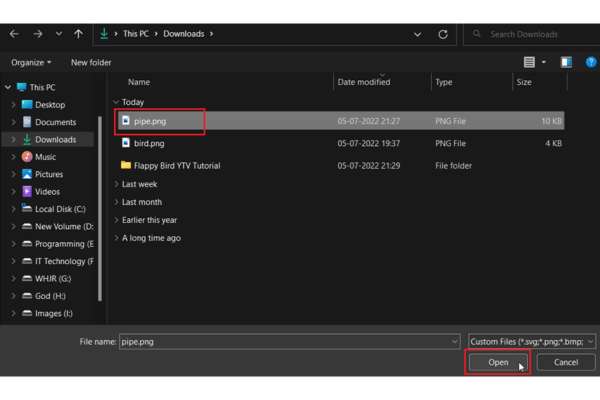
- Pipe sprite added. Let’s modify it.
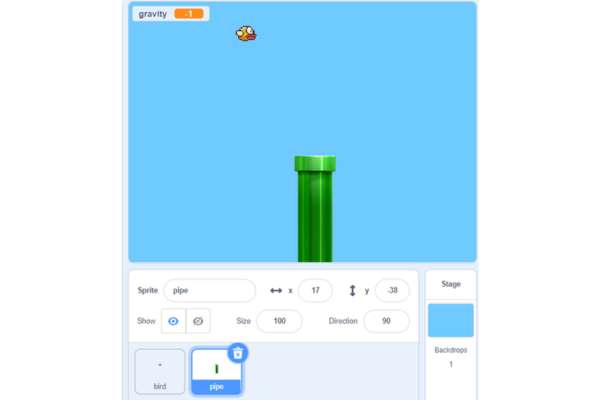
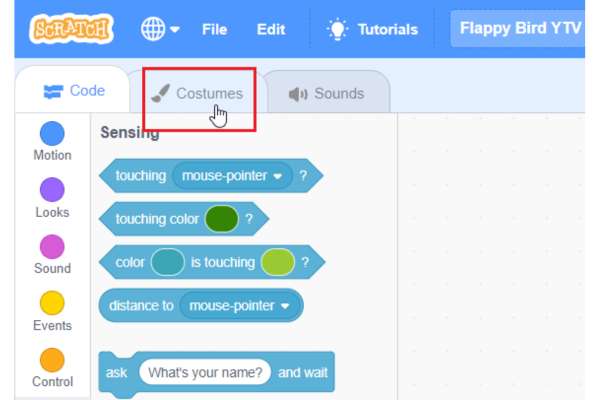
- Click on the “Costumes”
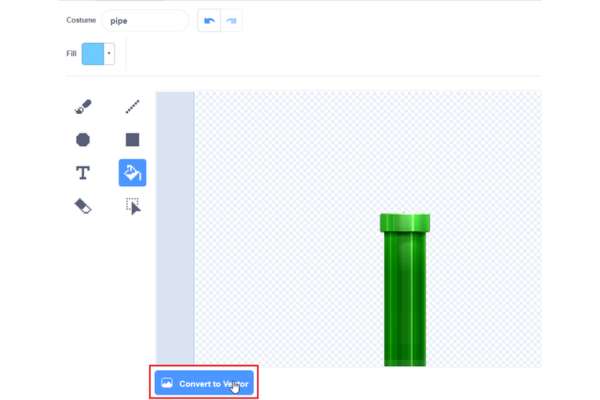
- Click on the “Convert to Vector”
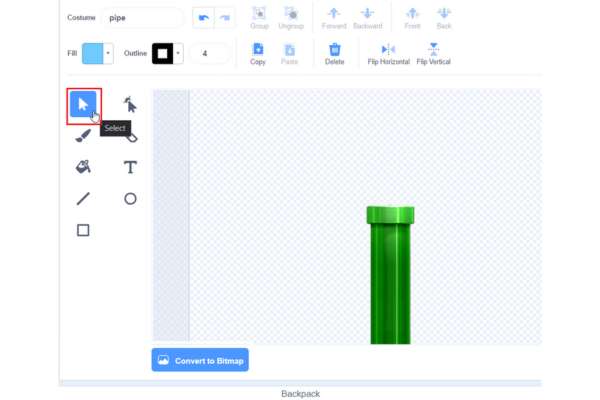
- Click on “Select” from paint tools.
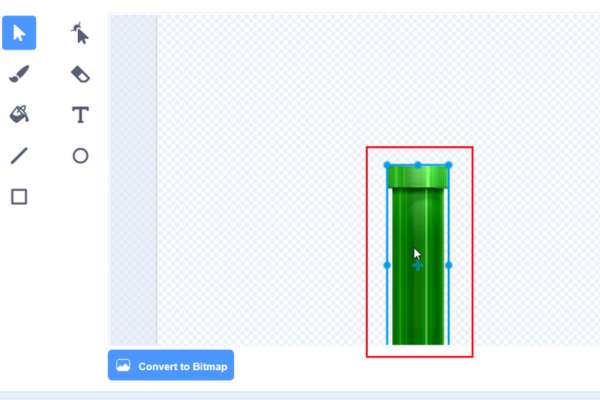
- Click on the pipe
- Make a duplicate of the pipe sprite.
- Press “Ctrl + c” and then press “Ctrl + v”.
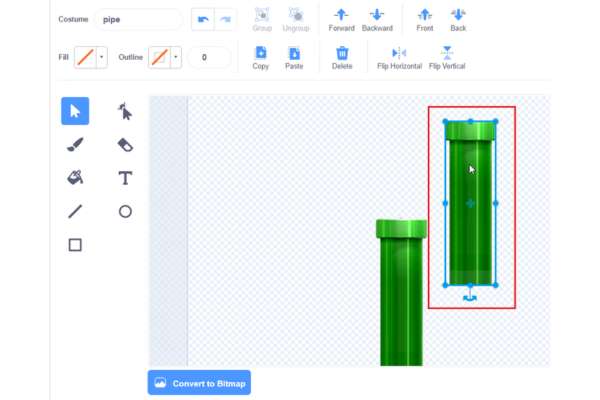
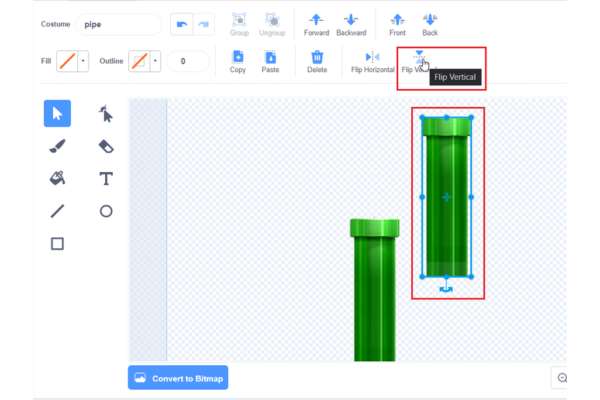
- Click on the duplicated “pipe” then click on the “Flip Vertical”
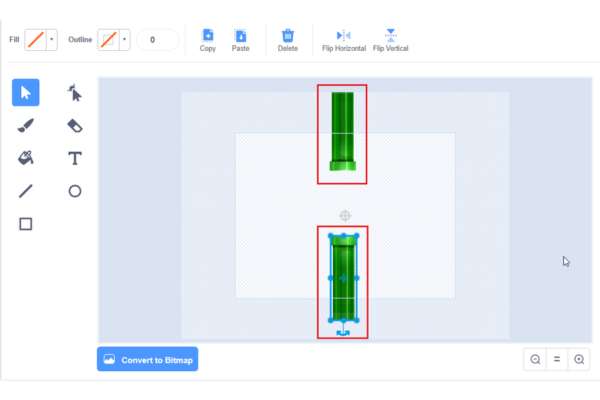
- Arrange both “pipe” sprites as shown below.
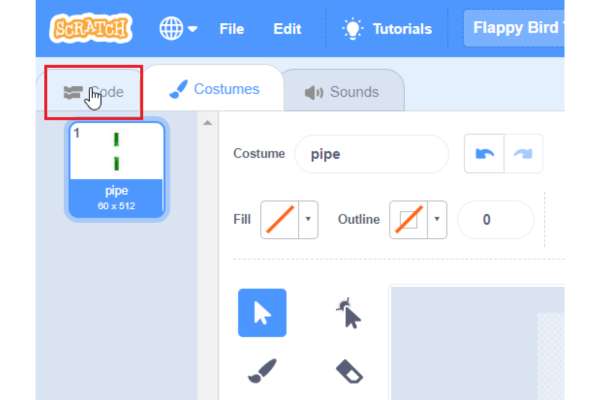
- Click on the “Code”
Step 3: Make the pillars move across the screen
- Let’s make these pipes and move them from right to left. Also, create multiple duplicates of these pipes.
- Drag & drop the “create a clone of myself” block as shown below.
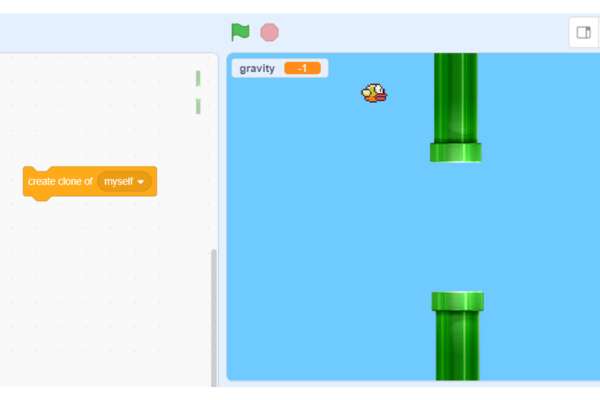
- Add some delay to the code so that each clone will create every second.
- Drag & drop “wait seconds” and “forever” blocks as shown below.
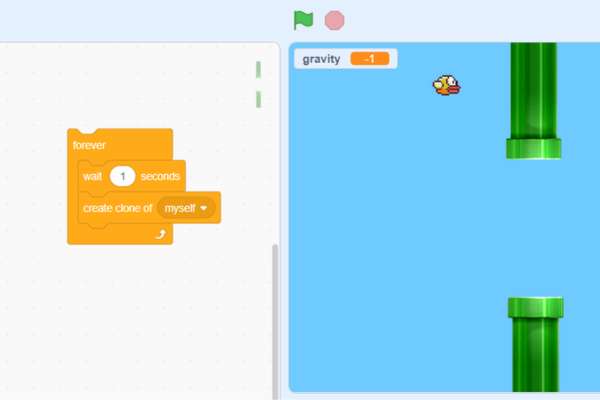
- Drag & drop “when green flag clicked” block on top as shown below.
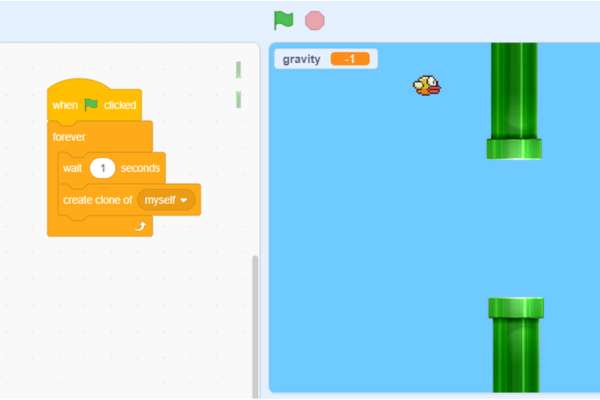
- In Scratch, you can program the clone of any sprite.
- Drag & drop the “when I start as a clone” block.
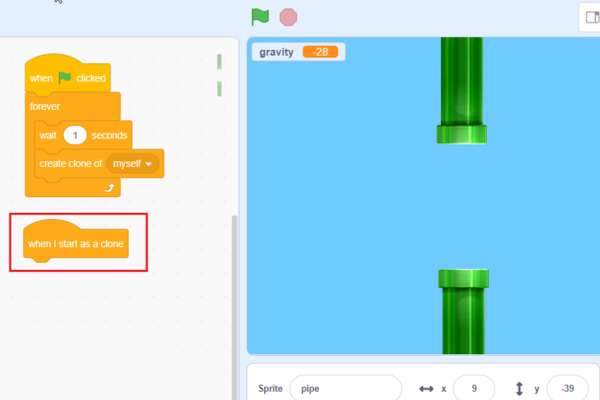
- Make pipe sprite move from right to left. In Scratch, we can do this by changing the sprite’s X value with a negative number.
- Also, write a conditional statement to check whether the sprite is reached at the left edge of the scratch stage.
- Change the pipe sprite’s X value till the pipe sprite touches the left edge of the scratch stage.
- Drag & drop the “repeat until” block as shown below.
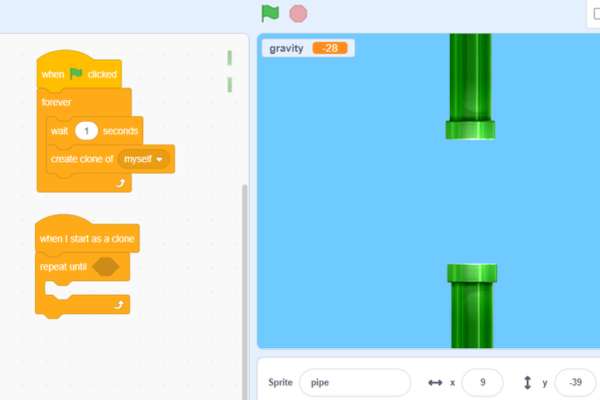
- Drag & drop the “less than”, and the “x position” block as shown below.
- Change the “less than” block value by -240.
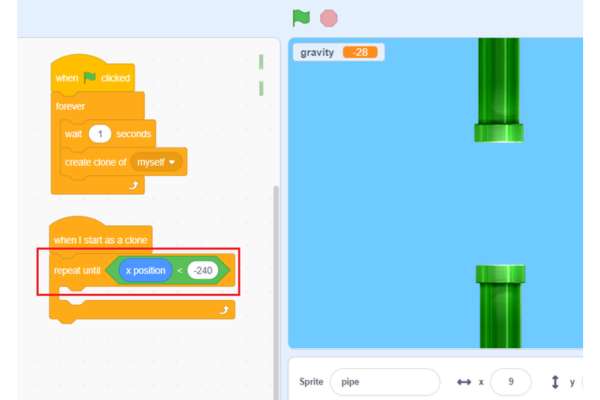
- Drag & drop the “change x by” block as shown below
- Change the “change x by” value with a negative number; this number will be the speed of the pipes (obstacle for the bird) movement.
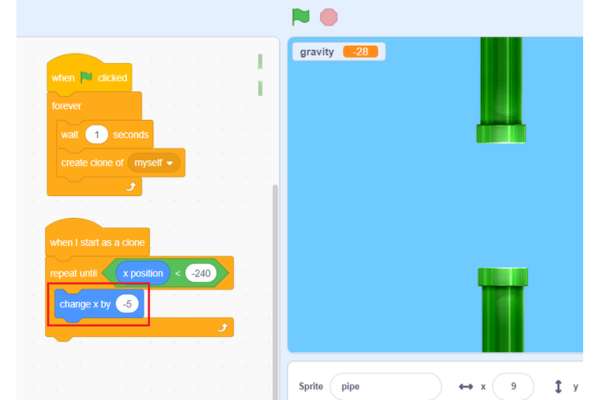
- Click on the “green flag”.
- Pipi is moving from right to left. But stuck at the scratch left stage edge.
- Let’s delete it once touches the left scratch stage edge.
- Drag & drop the “delete this clone” block as shown below.
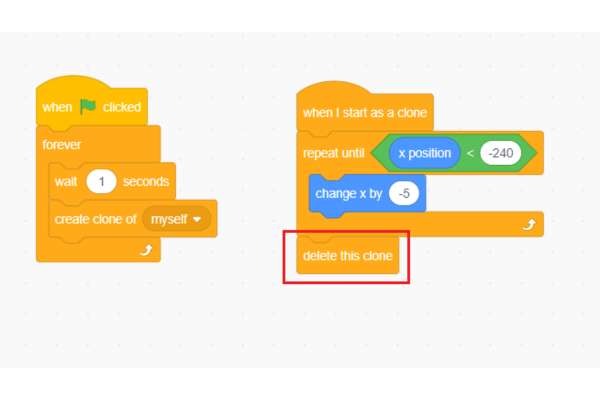
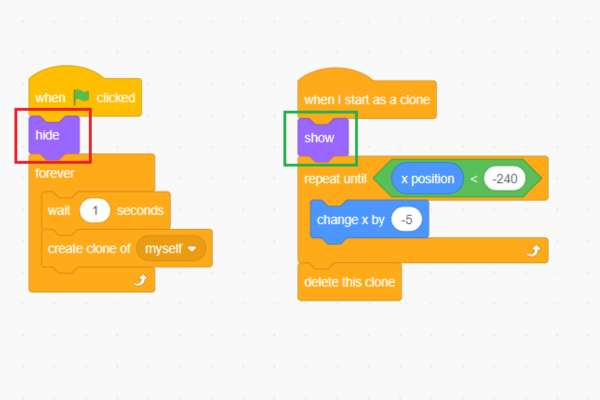
- Also, hide the pipe sprite when the game starts and then show the pipe sprite when starting the clone.
- Drag & drop the “hide” & “show” blocks as shown below and set the start point when starting as a clone.
- Drag & drop the “go to x y” block as shown below.
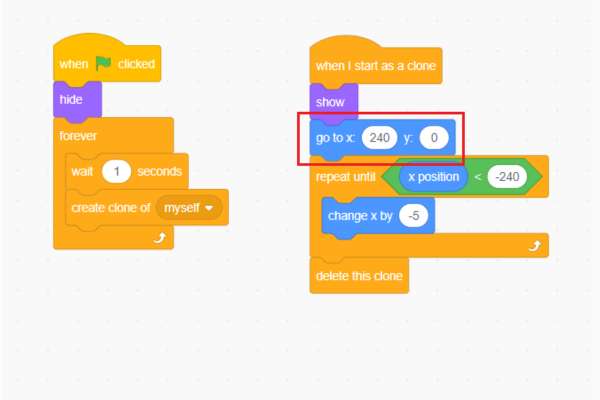
- Click on the “green flag”.
- Pipes are coming from right to left but all pipe sprites are coming from the same height to enhance the game let’s make it random.
- Drag & drop the “pick random to” block to the “go to x y” block as shown below.
- Set the “go to x y” block’s y number -100 to 100.
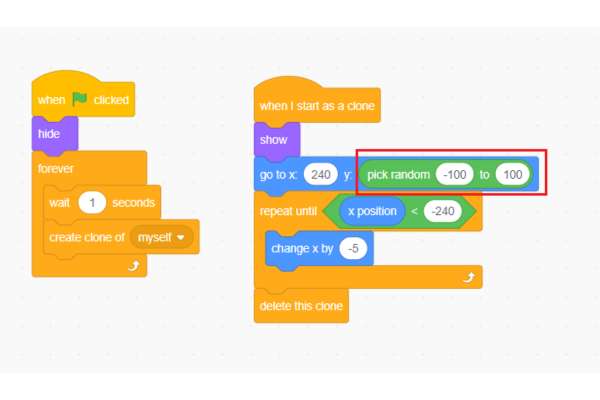
- Click on the “green flag”.
- Pipes are now coming from right to left at a random height.
Step 4: Make a background [end of the game]
Let’s make a background for the end of the game.
- Click on the sprite’s “Paint”.
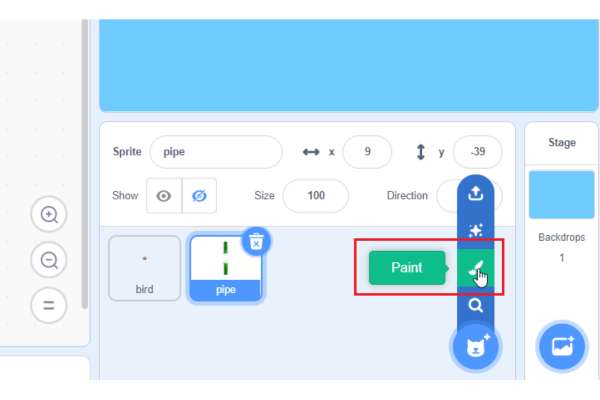
- Click on the “Convert to Bitmap”
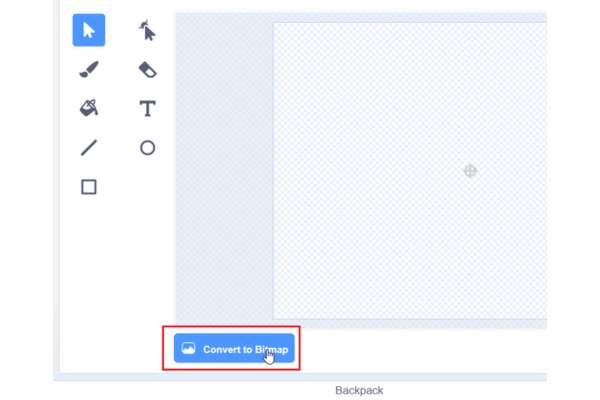
- Click on the “Fill” and select the black color.
- Click on the “Fill” tool.
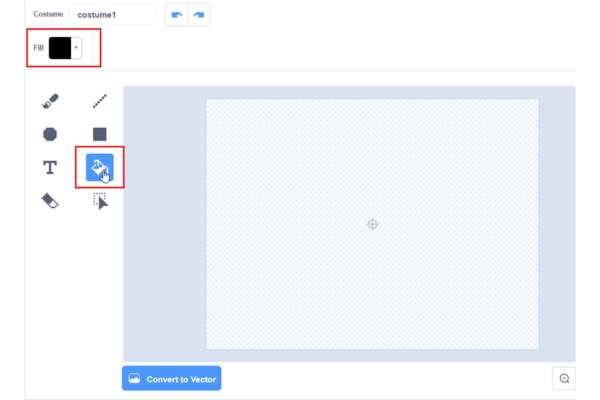
- Click on the paint area.
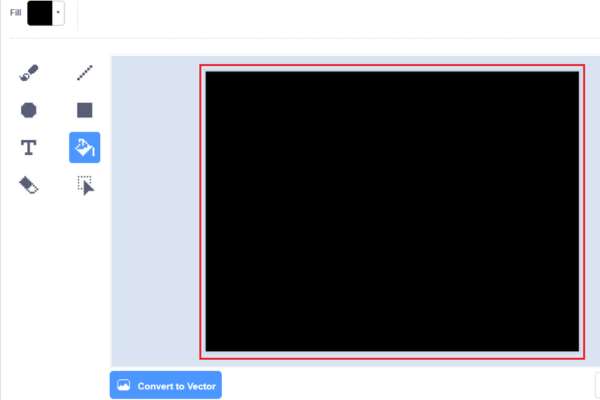
- Click on the “Convert to Vector”
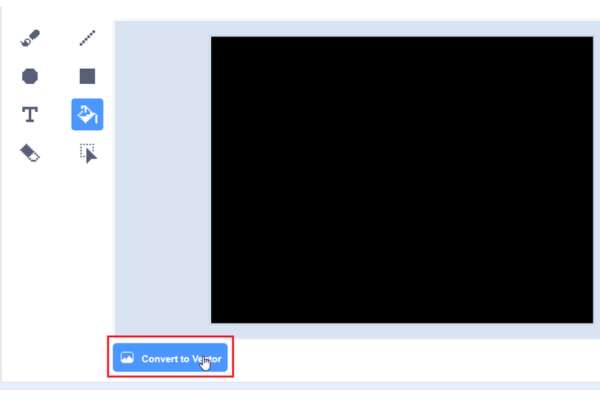
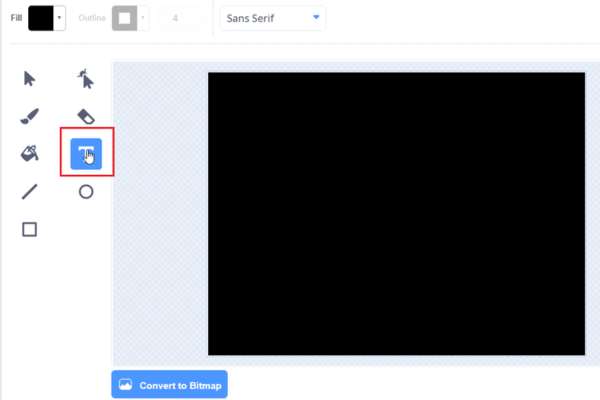
- Click on the “Text” tool
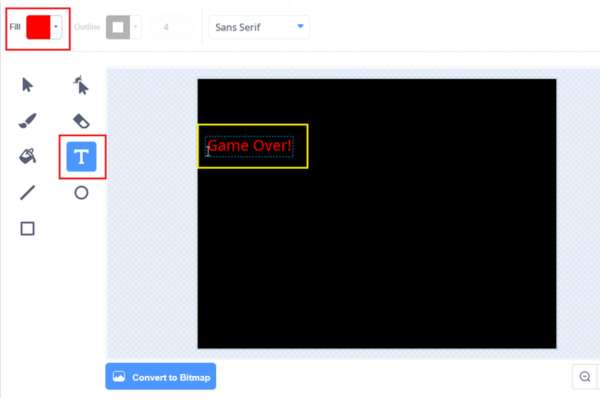
- Click on the “Fill” and select the red color.
- Click on the “Text” tool and click on the paint area.
- Write a message for the end of the game [here, Game Over!].
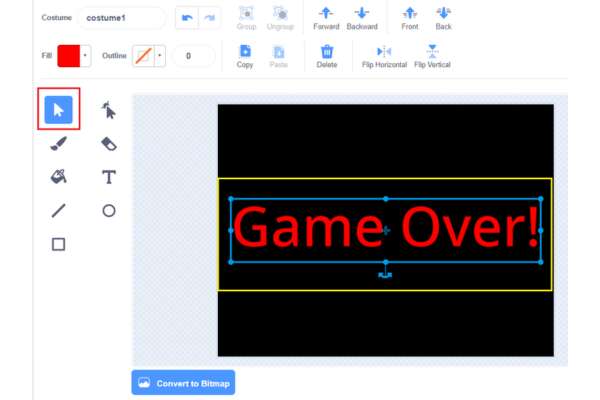
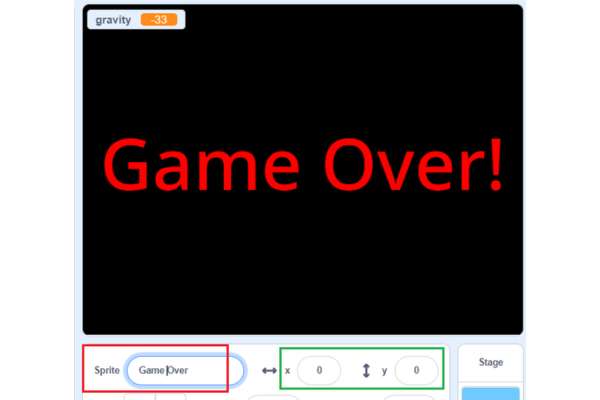
- Change the sprite name.
- Change the position of the sprite, set the value (x, y) = (0, 0)
- Click on the “Code”
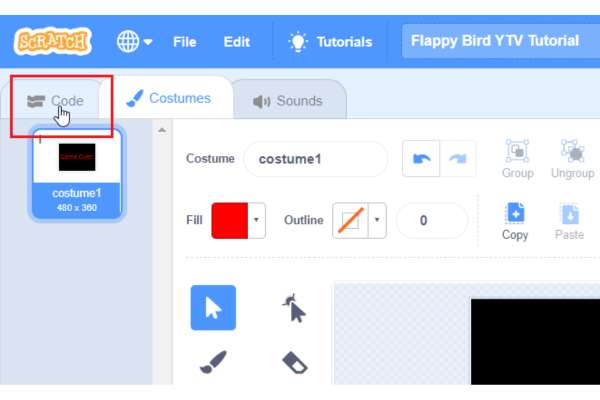
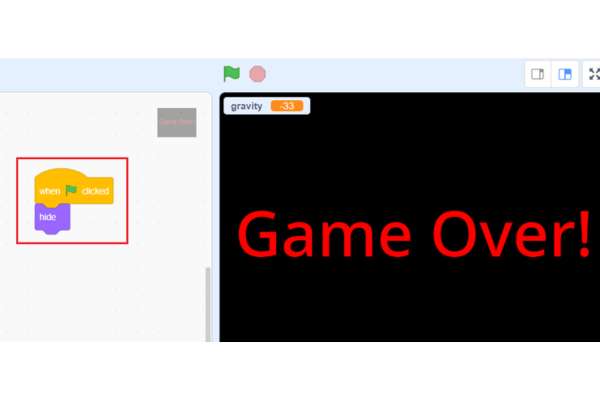
- Hide the game over sprite when the game start.
- Drag & drop “when green flag clicked” and “hide” blocks as shown below.
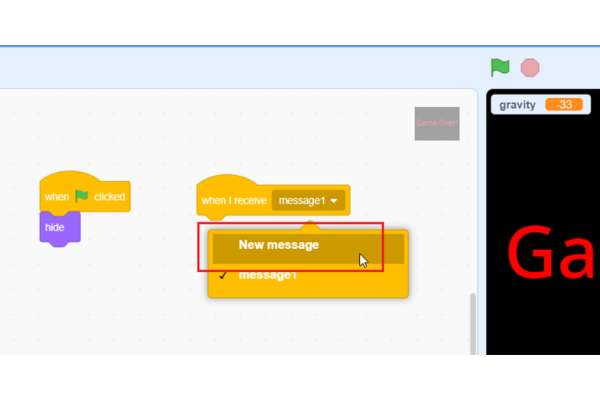
- To show the “game over” sprite on the game over message, let’s add a message receive block.
- Drag & drop “when I receive message1” block and select “New message”
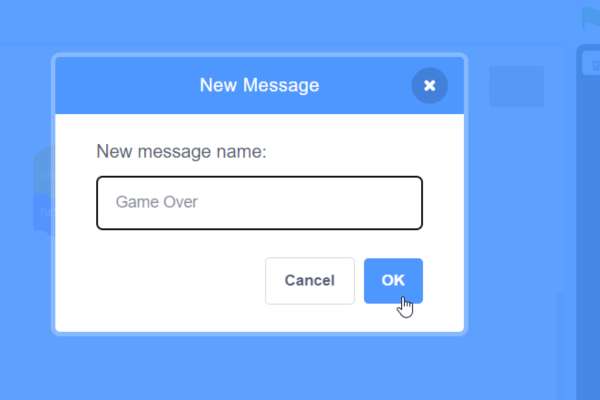
- Type the message for the end of the game.
- Click on “Ok”
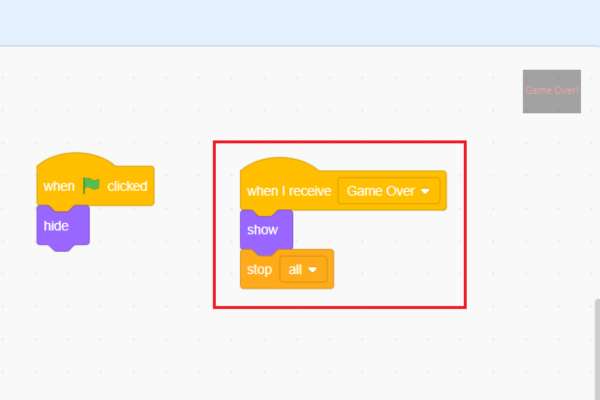
- Drag and drop the “When I receive the Game Over” message then it’ll show the “game over” sprite and stop the flappy bird game.
- Drag & drop “show” and “stop all” blocks as shown below.
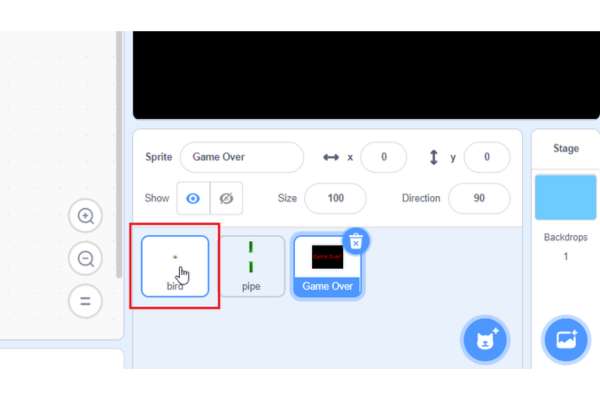
- Click on the “bird” sprite.
- End the game if the bird touches the pipe sprite.
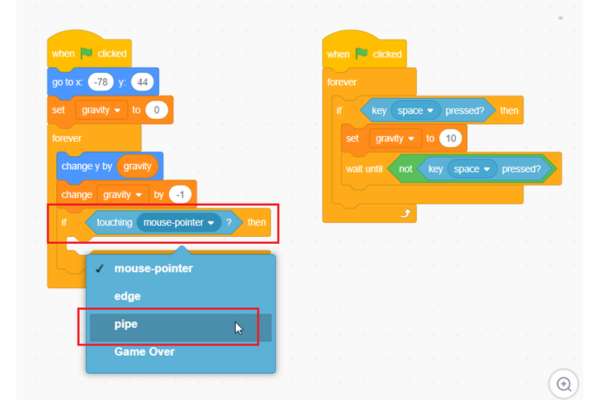
- Write a conditional statement to check whether the bird touches the pipe sprite.
- Drag & drop “if-then” and “touching” blocks as shown below and click on the dropdown and select “pipe” sprite.
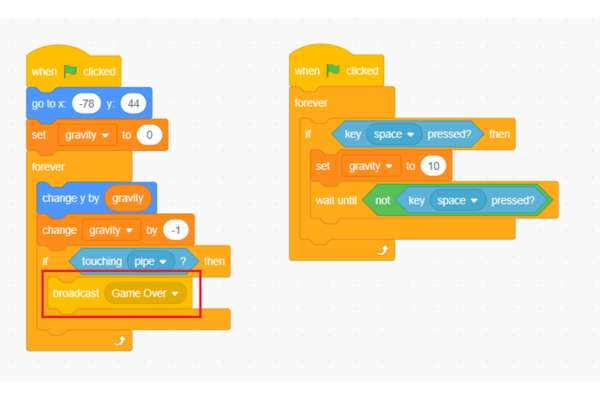
- Let’s broadcast a game-over message.
- Drag & drop the “broadcast Game Over” block as shown below.
Step 5: Setting the score
- Let’s add a score to the game.
- Create a variable to keep track of the score.
- Click on the “Variables” then click on “Make a Variable”.
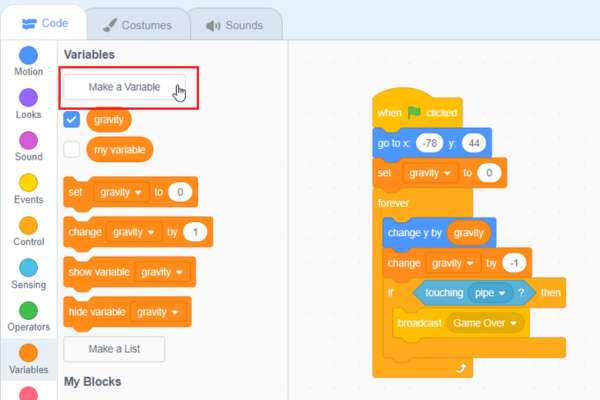
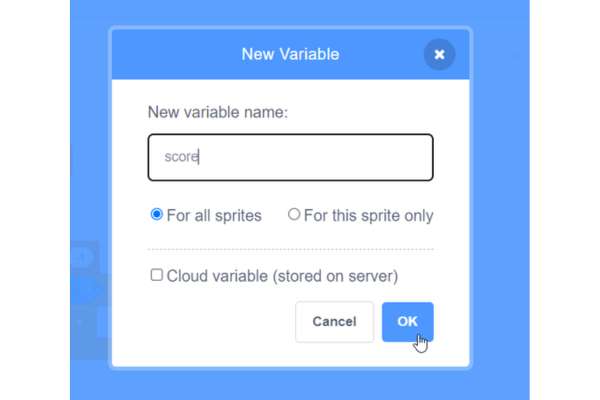
- Name the variable.
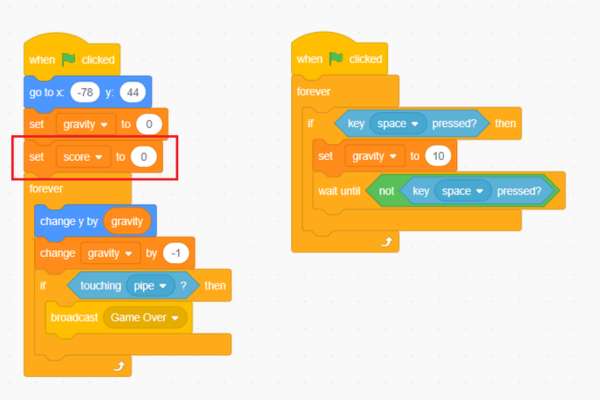
- Set the score to zero when the game start.
- Drag & drop “set score to” block as shown below.
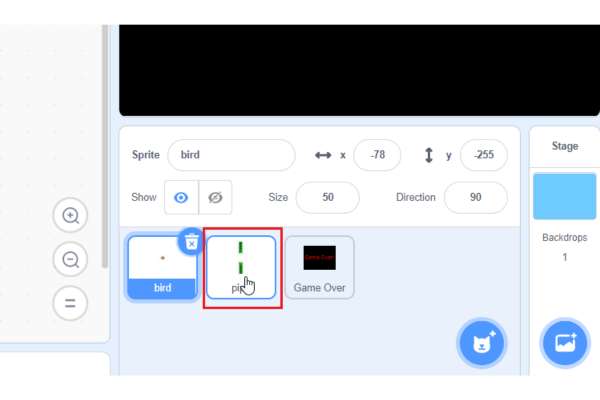
- Click on the “pipe” sprite.
- Increase the score when the bird successfully passes the pipe sprite.
- Drag & drop the “change score by” block and change the number by 1 as shown below.
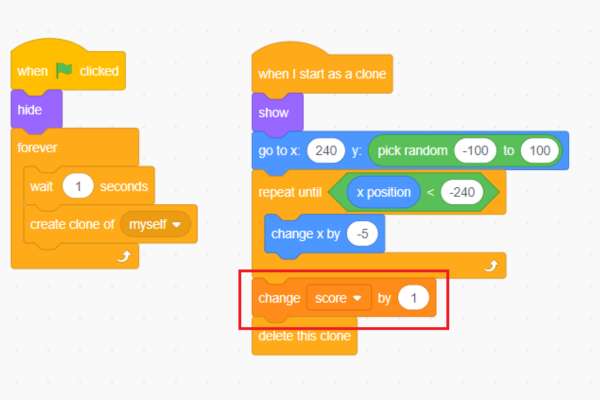
- Click on the “green flag”.
- Now, the score increases on each successful pipe sprite cross.
Time to Play!
- Congratulations, you have completed the Flappy bird game in Scratch!
- Click on “green flag” to start playing the Flappy bird game. What are the enhancements to the game you can think of? Do let us know in the comments section below.
Looking to learn Scratch coding? Explore Wiingy’s Online Scratch Coding Classes For Kids to learn from top Scratch coding experts.

Frequently asked questions (FAQs)
What is the flappy bird game on Scratch?
The flappy bird on Scratch is where the bird flies through a bunch of pillars all the while avoiding touching the pillars. If the bird touches the pillars then it is game over.
What is the easiest game to create a Scratch?
Some of the easiest games to create on Scratch are maze games, dodging games, platform games, and puzzle games.
What is the most popular game on Scratch?
The most played game of Scratch is Paper Minecraft v11.6 (Minecraft 2D) with over 35000 hearts.
What is the funniest game on Scratch?
There are many fun games you can make on Scratch like Flip 3D, Pokemon, Random tycoon thing, Fortnite Z, Old western way, Ball blast, and many more.
What are the steps to create the flappy bird game on Scratch?
Follow the steps mentioned below to create a flappy bird game on Scratch:
- Make a flappy motion sprite [bird]
- Add the pillars sprite [that the bird will fly through]
- Make the pillars move across the screen
- Make a background [end of the game]
- Keep score
Want to create more fun games on Scratch? Read our other Scratch game blogs like knife game, snake game, pong game, and many more!

