How to Make Apple Clicker Game on Scratch with Levels?
- Sachin Upadhayay |
- September 2, 2024
Updated By
Reviewed By
Scratch games are visually fun and interactive ways of learning coding and game development, especially for children between the ages of 8 to 16. A Clicker game on Scratch can be of different types depending on the movement of the sprite, objective, and rewards. In this blog, we will discuss how to make an apple clicker game on Scratch with levels. Read more to learn the step-by-step game instructions and create the game.
Looking to learn Scratch coding? Explore Wiingy’s Online Scratch Coding Classes For Kids to learn from top Scratch coding experts.
This is Chapter 2.9 in the
Scratch Game Tutorial
How do you make a clicker game on Scratch?
A Clicker game is where there is a certain sprite [Apple] that you can click on to get more points, and then, there are other items that you can buy that’ll give you even more points. As you click on the apple, your points increase, and after ten points, it automatically ends. Another sprite [Orange] that you can buy. After clicking on “Orange,” you will get an automatic score that will keep increasing by one point every second. The steps involved in making a Clicker Game on Scratch are explained below:
- Create a clickable object [sprite]
- Create a purchasable object [sprite]
- Set the game cost and reward rules
- Add automatic points in the Clicker game
How to make an apple clicker game on Scratch with levels?
The detailed steps on how to create a clicker game on Scratch with levels are explained below:
Step 1: Make a clickable sprite Scratch
The first step towards the clicker game is to create a spirte that can be clicked. The detailed steps on how to make an object clickable in Scratch are explained below:
- Let us pick the first object that you want to be able to click on.
- Delete the Cat sprite and choose a different sprite for this game.
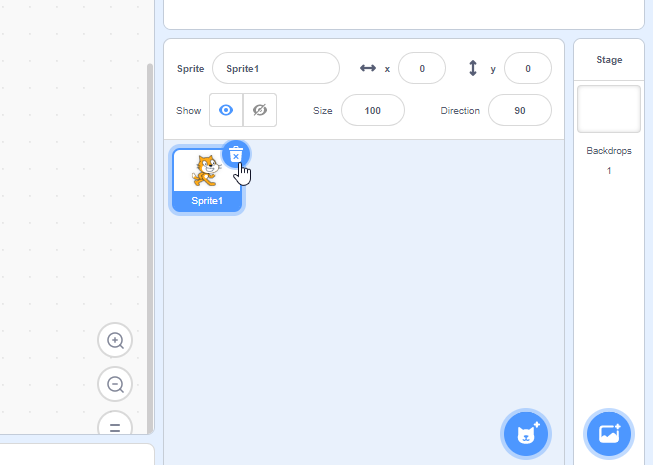
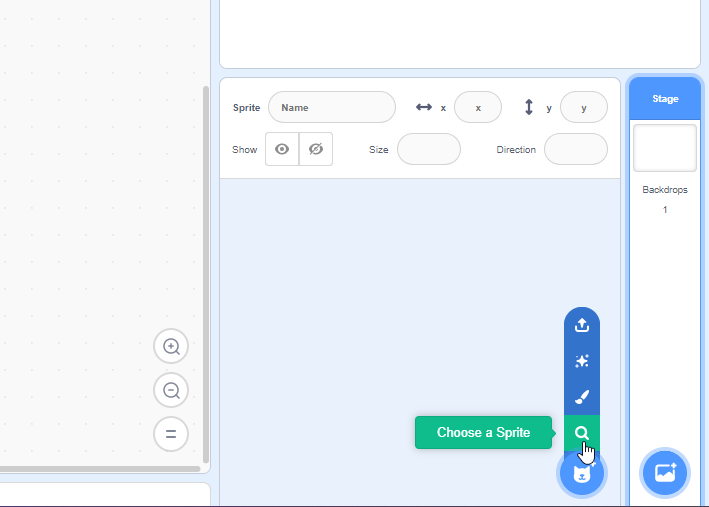
- Click on choose a Sprite.
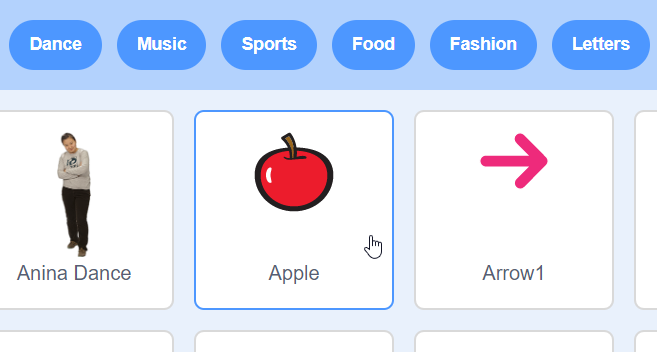
- Click on Apple, you can pick any character from scratch’s library of sprites.
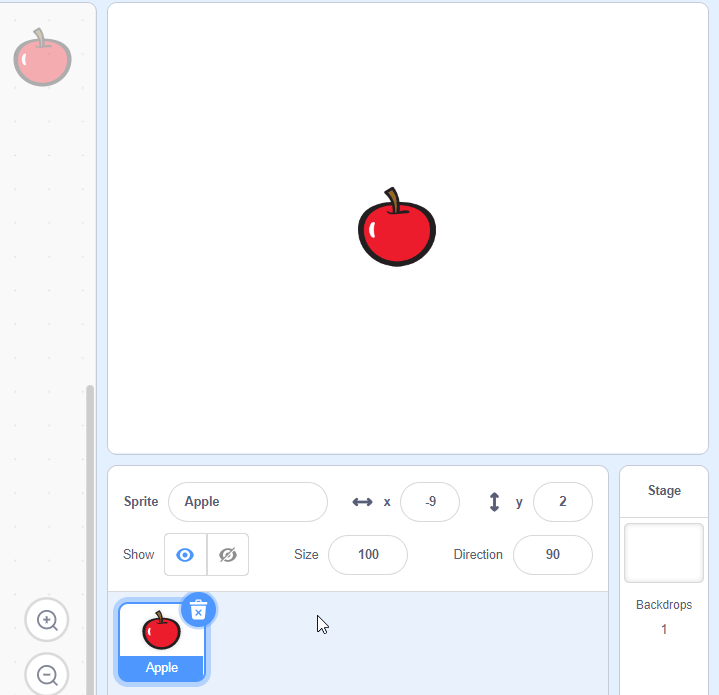
- After clicking on Apple, you should see the ball in the stage area.
- Make Apple sprite play a sound when you click it.
- Drag & drop “start sound” and click on it.
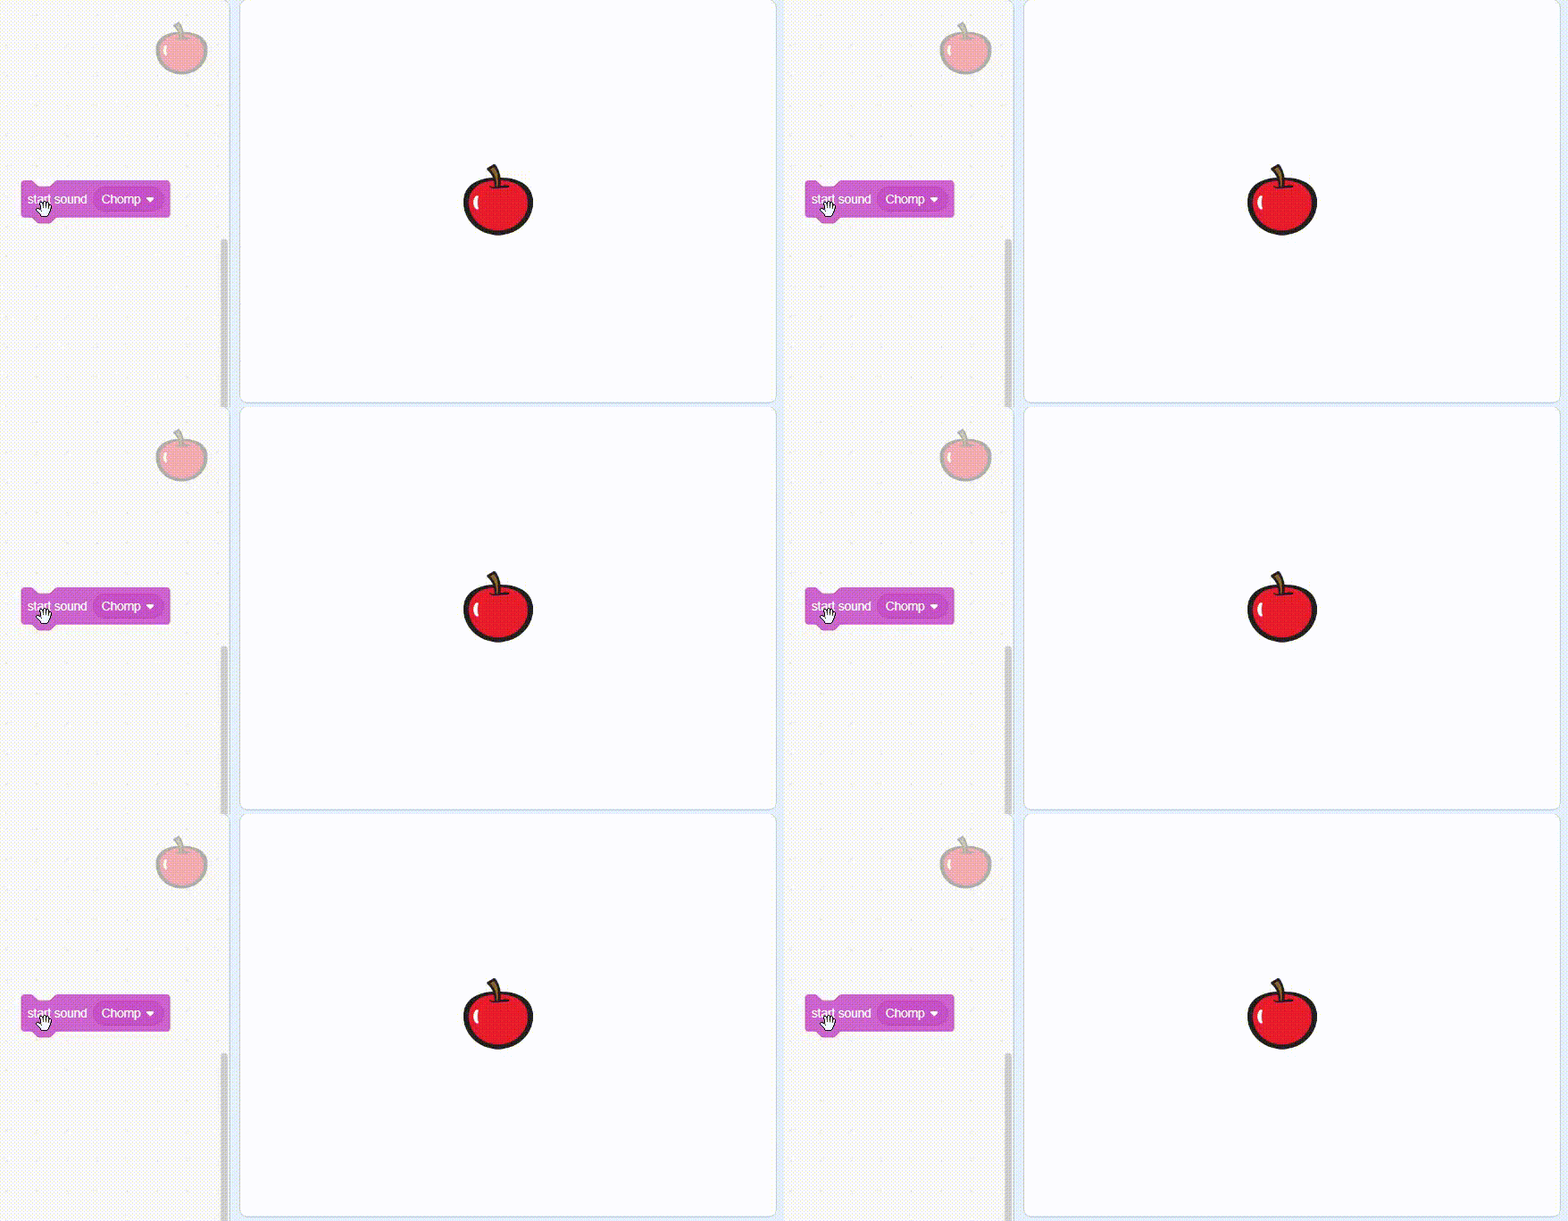
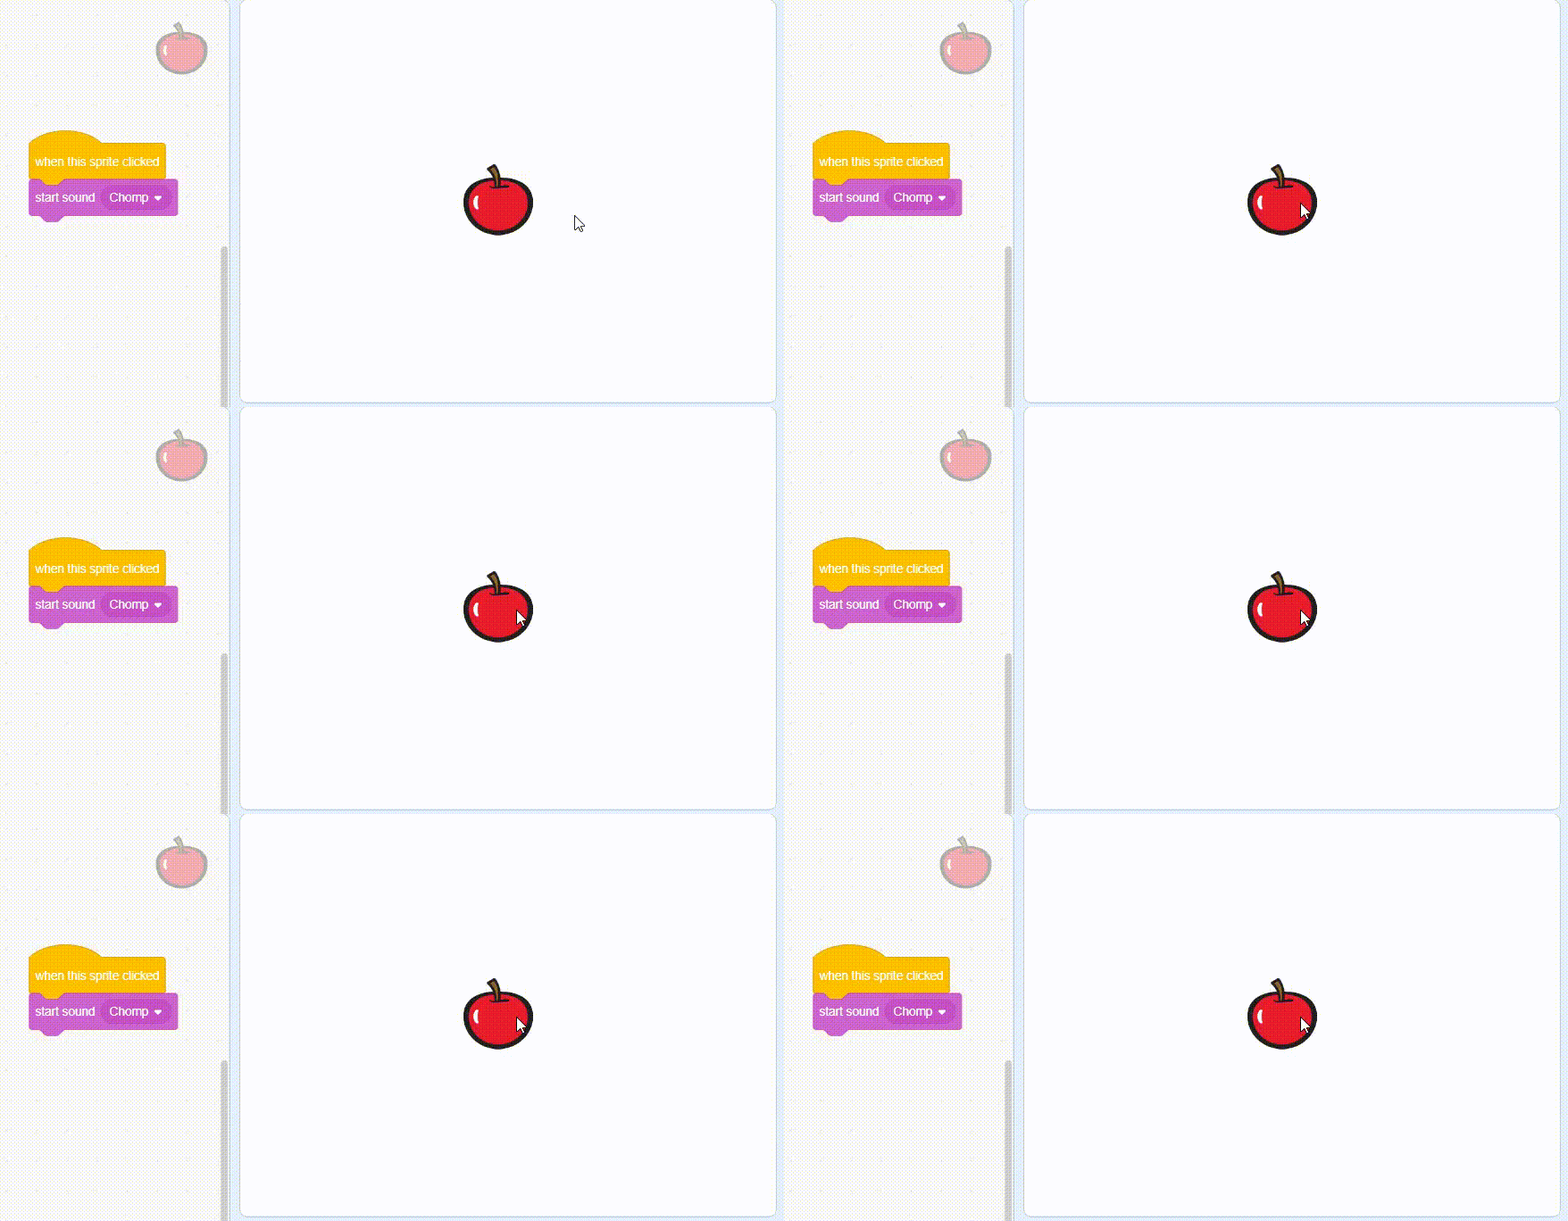
- Add a “when this sprite clicked” block on top.
- Click on the Apple & it should play a sound.
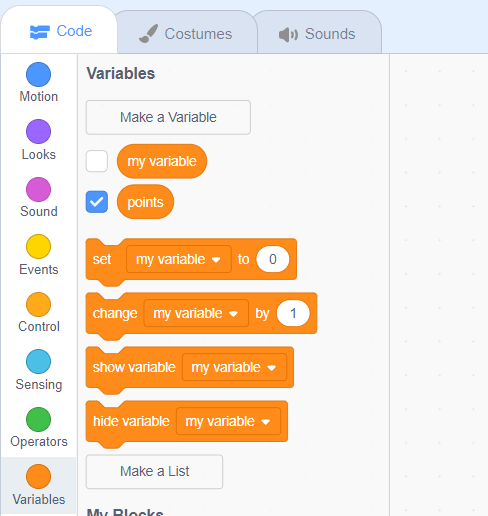
- Use variables to set up points so that every time you click on the apple, you get a point.
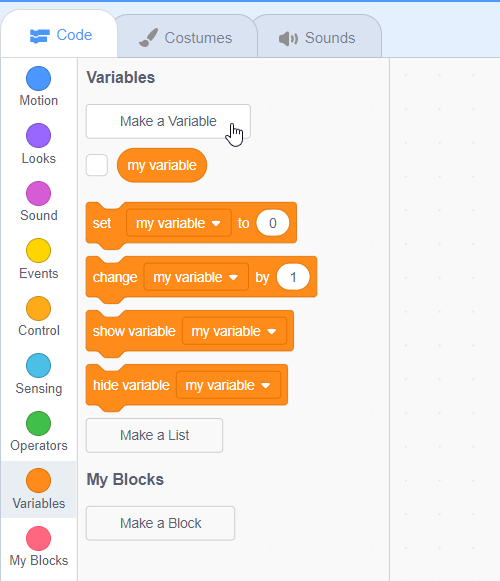
- Click on the “Variables” block & then click on the “Make a Variable” block.
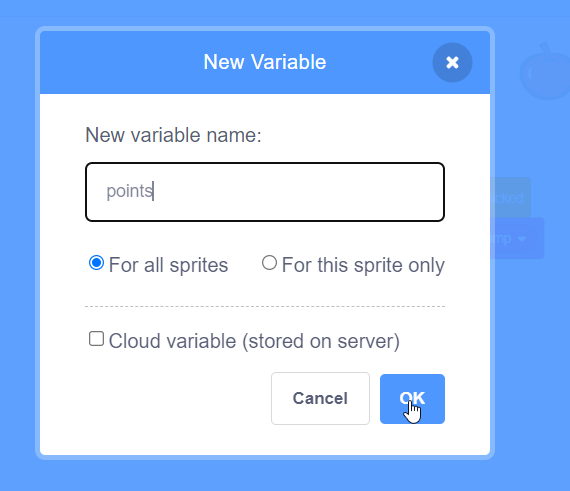
- Name your variable.
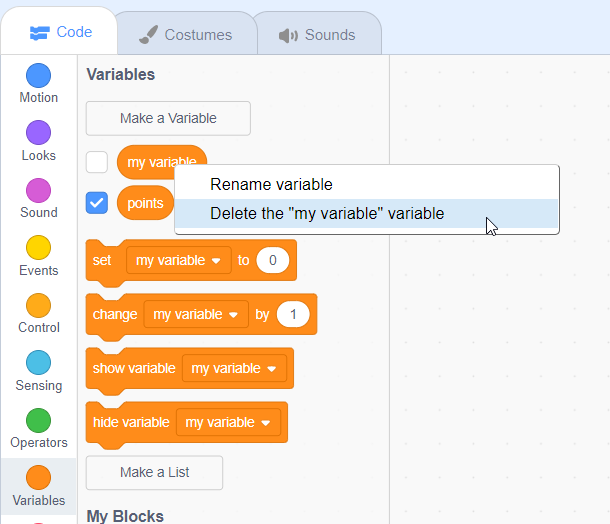
- Delete “my variable”.
- Right-click on the “my variable”.
- Click on the “Delete my variable” block to keep track of how many points you have scored.
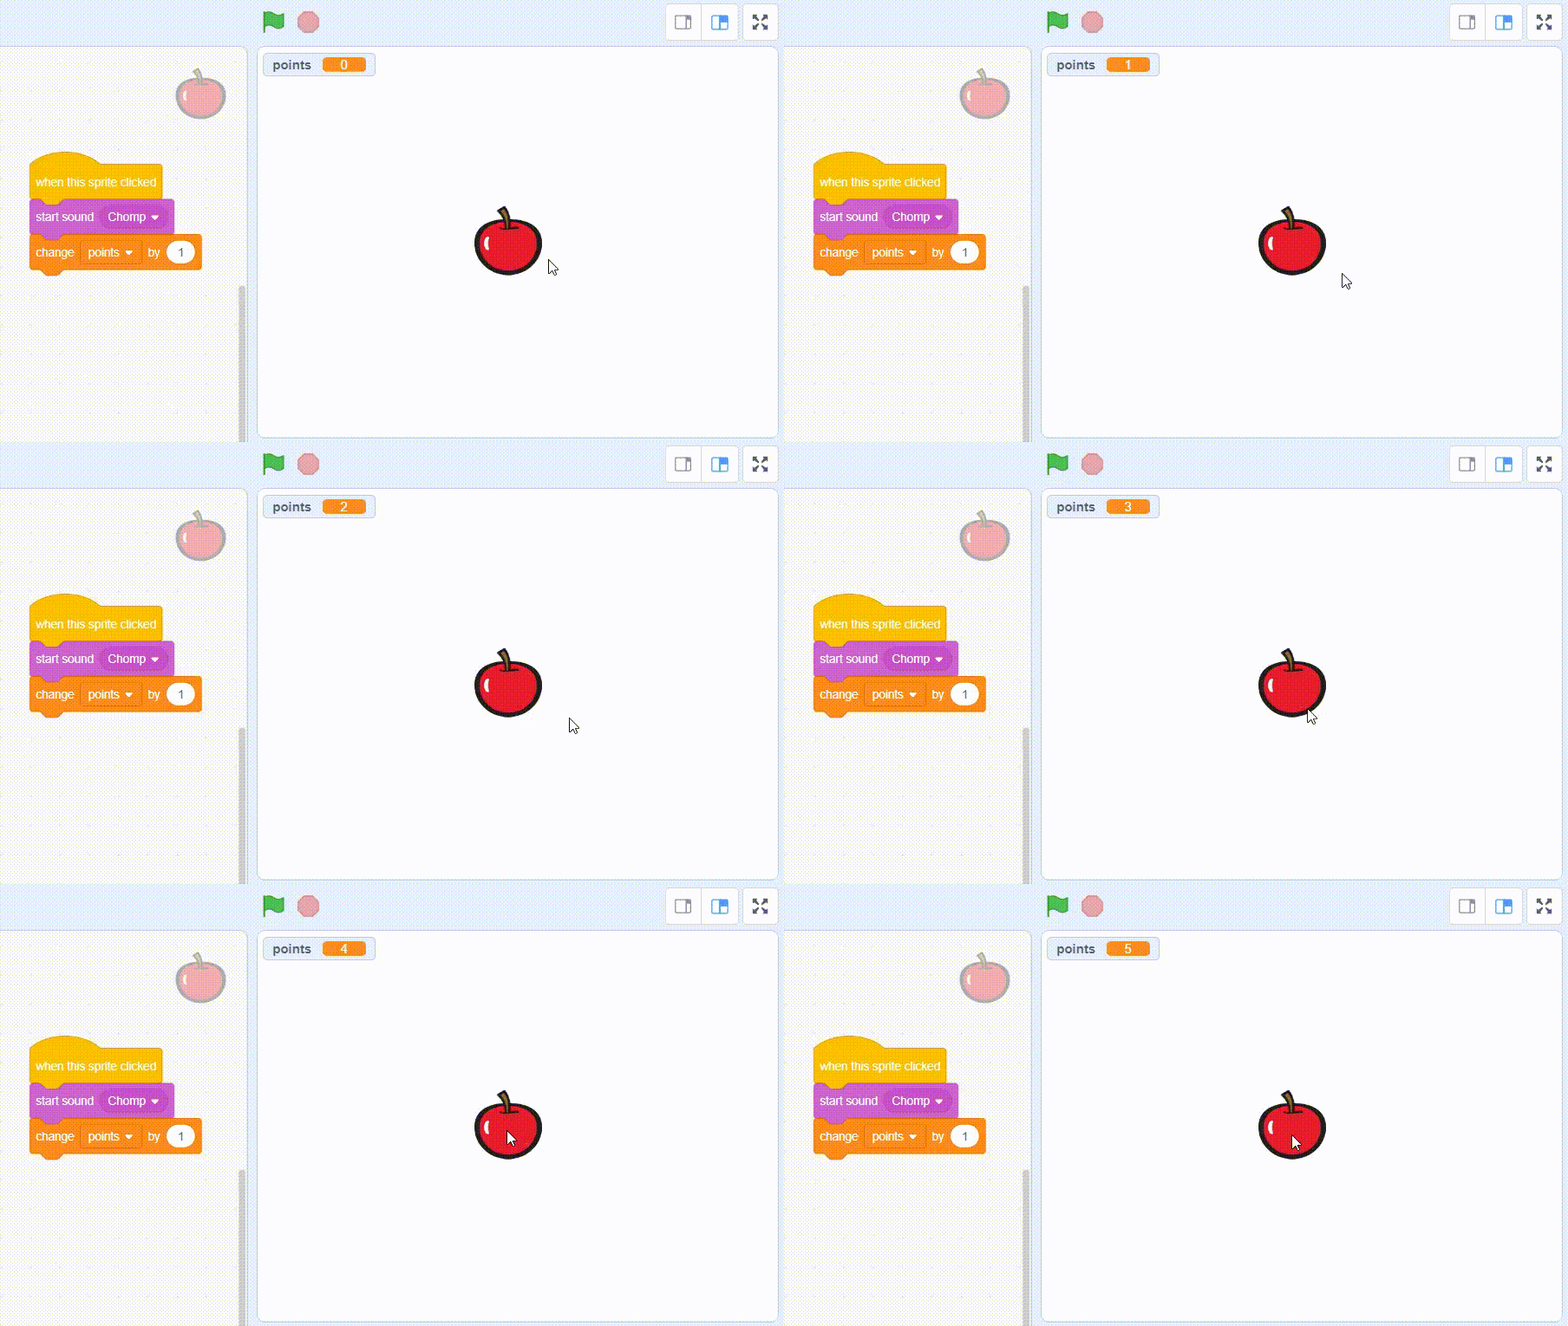
- Set up a rule so that every time you click on the Apple, you get a point.
- Drag & drop “change points by” block & change points by one. Now every time you click the Apple your points will be increased by one.
- Set the points to zero when the game starts.
- Drag & drop “set points to” block and set it to zero.
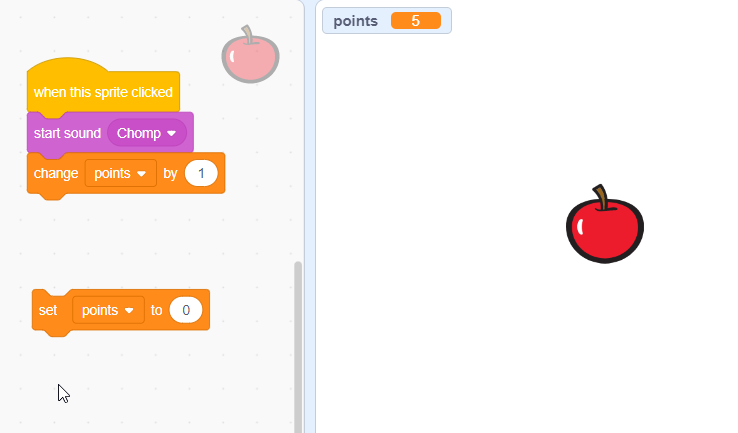
- Drag & drop “when green flag clicked” block on top of “set points to” block.
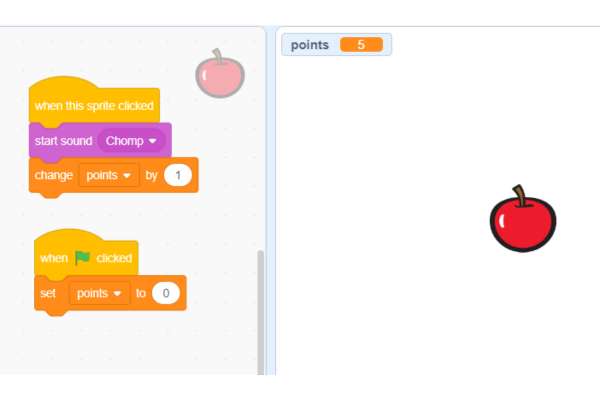
- Click on the “green flag”.
- Now, every time you click the green flag, the points are reset to zero. Also, you can also make the click even more satisfying by making the sprite grow or shrink when you click on it.

- From the “looks” category, drag & drop the “set the size to 110%” block and it gets a bit bigger.
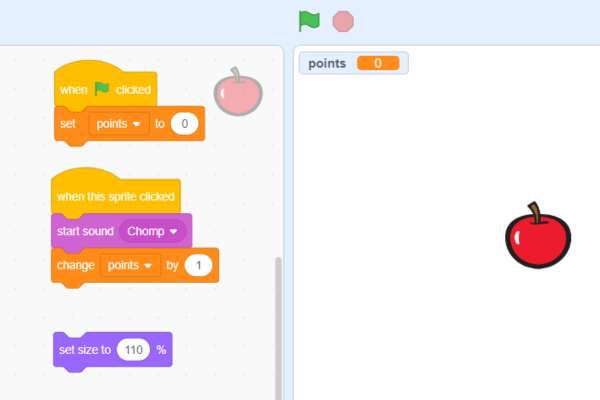
- From the “looks” category, drag & drop “set the size to 100” and the sprite will be restored to its usual size.
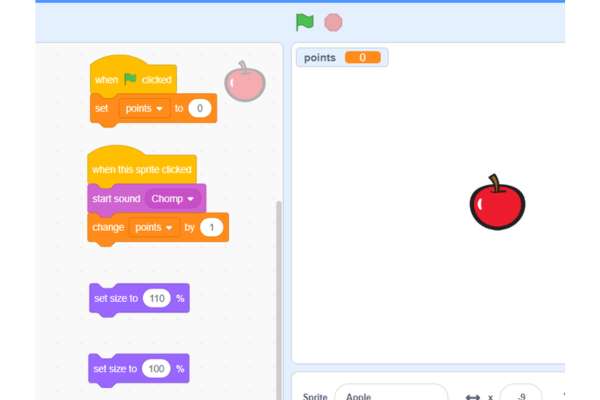
- Click on the “set size to” block as shown below.
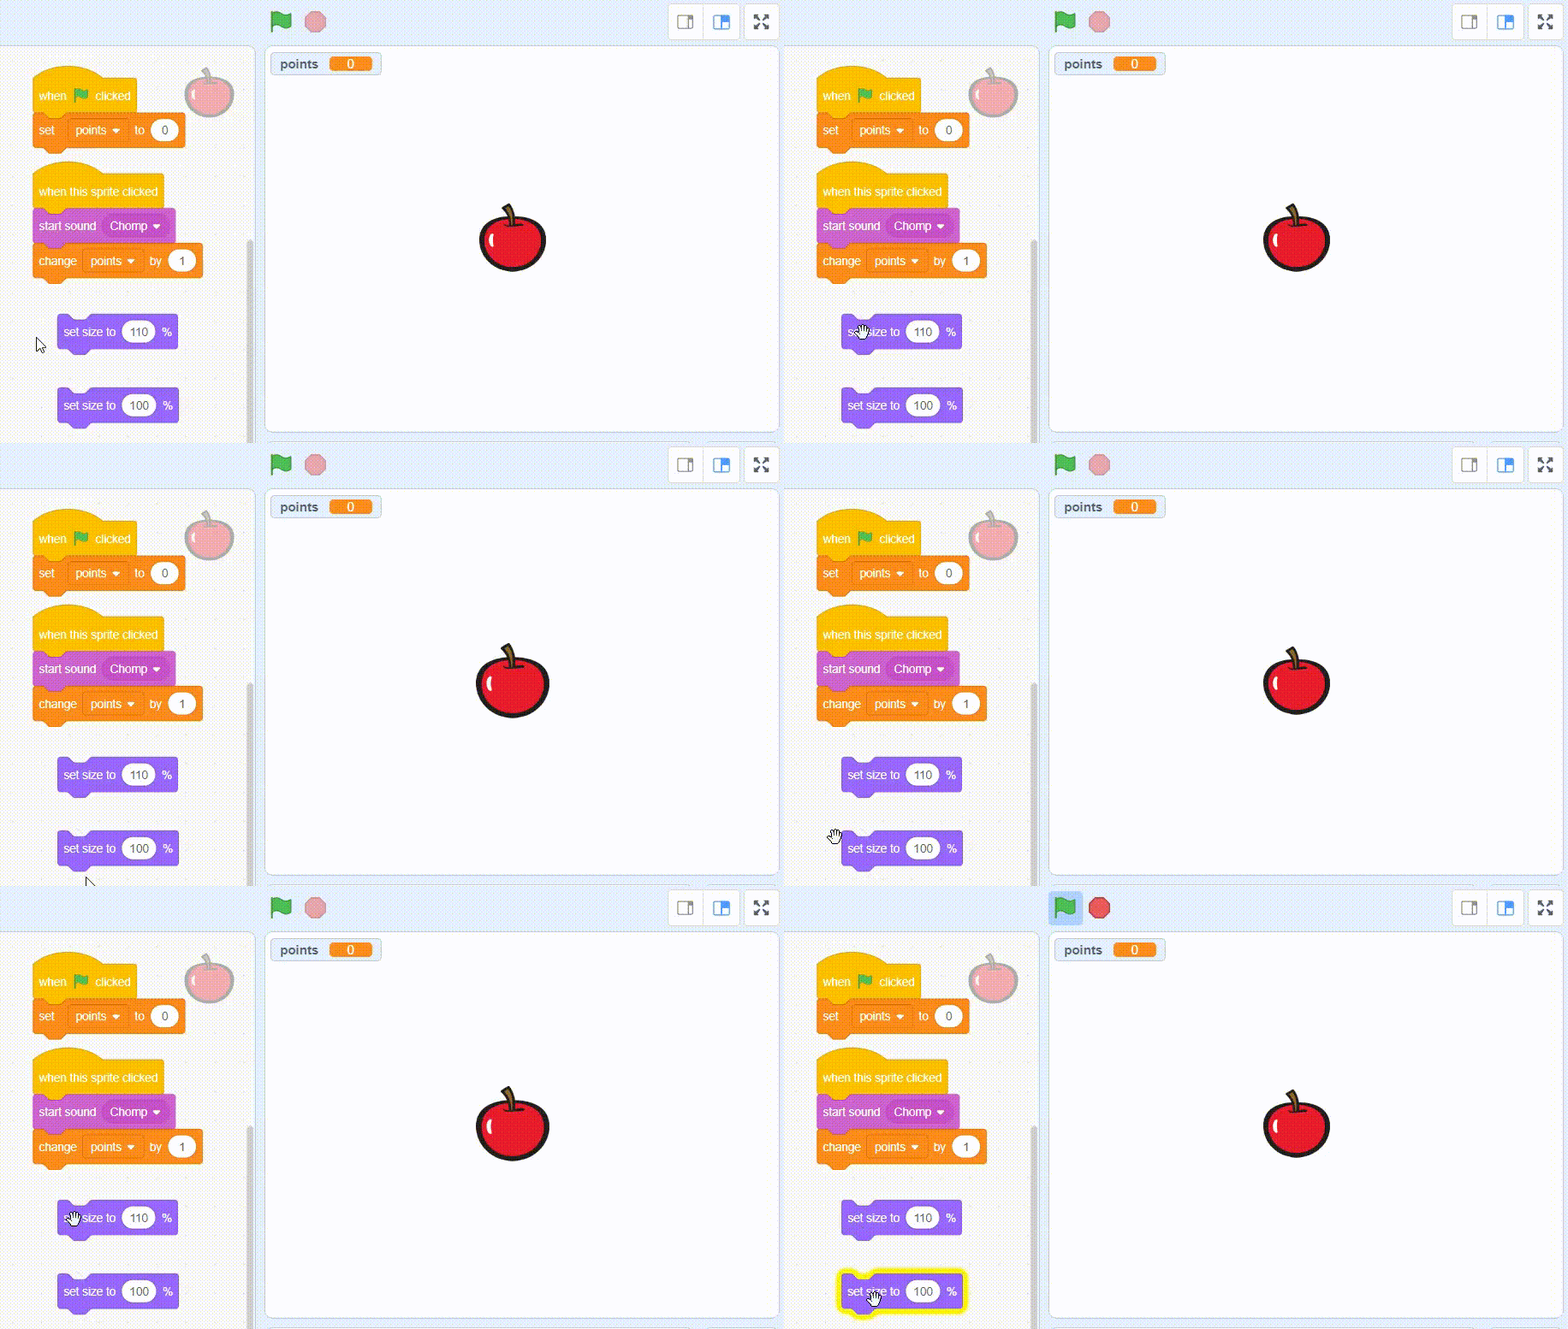
- Add a wait of 0.05 seconds and then set the size to 100, it does a little animation where it freezes and shrinks really quickly.
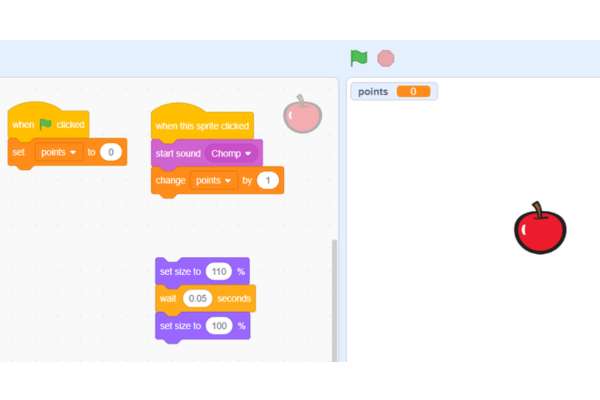
- Drag & drop the “set size to” and “wait” blocks as shown below.
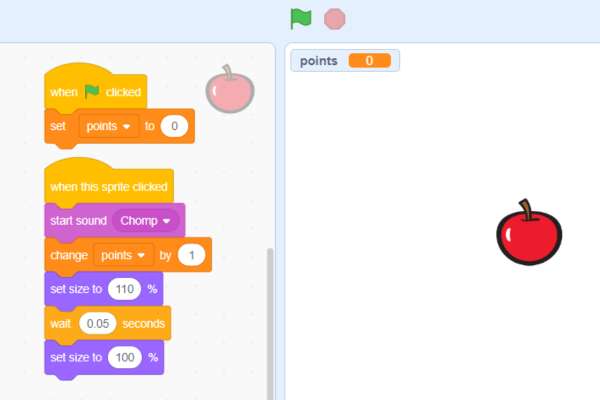
- Click on the “green flag”.

Step 2: Create a purchasable sprite [orange]
- Now, let us add the next item in the Clicker game. With the saved points you can now buy a purchasable item from the sprite list.
- Pick what you want to be in the next item, and click on “Choose a Sprite”
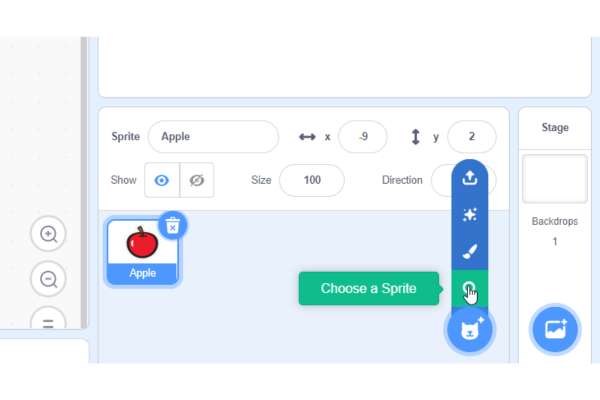
- Click on any sprite. We are going with Orange here.
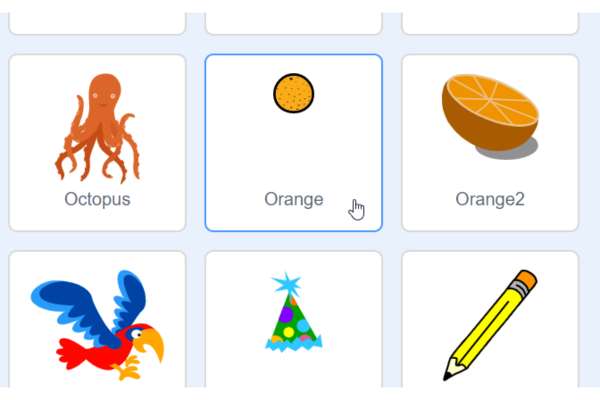
- Orange added.
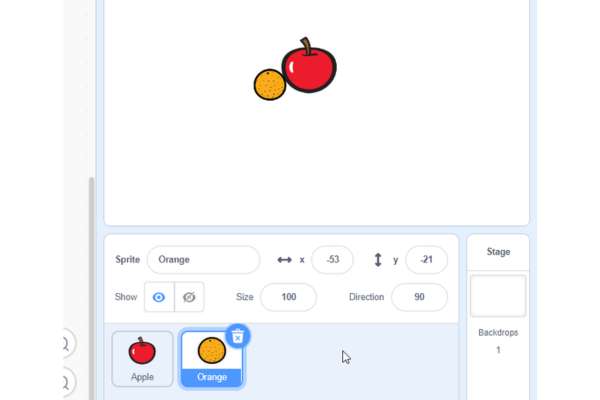
- Increase the Orange size by 150%
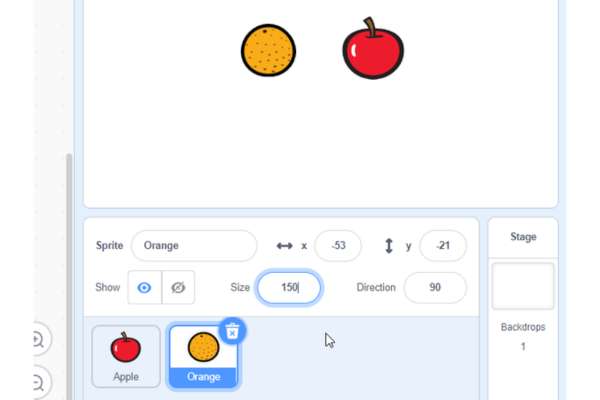
- Set the Orange as a purchasable item in the Clicker game.
- Let’s set the cost to 10 points which will enable you to click on the Orange and then when you click on it, you will automatically get one point every second.
- Then, you could click on the orange again and buy another. And now you’re getting two new points every second.
- Create a new variable to keep track of how many automatic points you are getting every second.
- Click on variable & then click on “Make a Variable”.
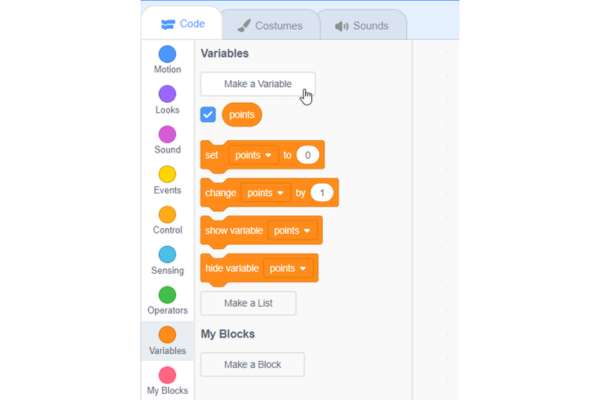
- Call it “automatic points per second”.
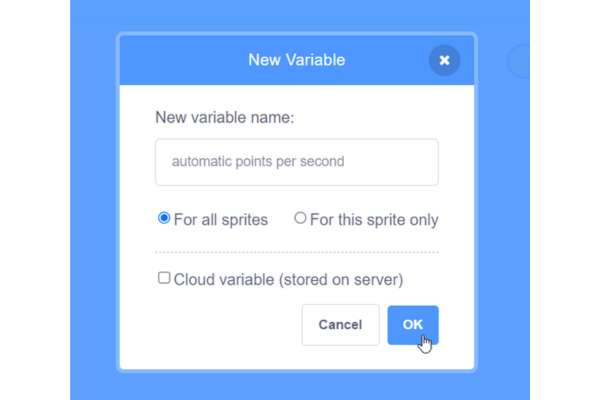
- “automatic points per second” variable is created.
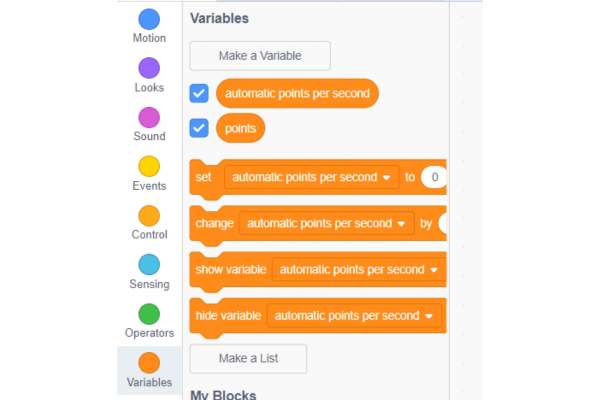
Step 3: Set game rules and cost
Now the next step in this game is to set game rules and costs. The steps to do this in Scratch editor are explained below:
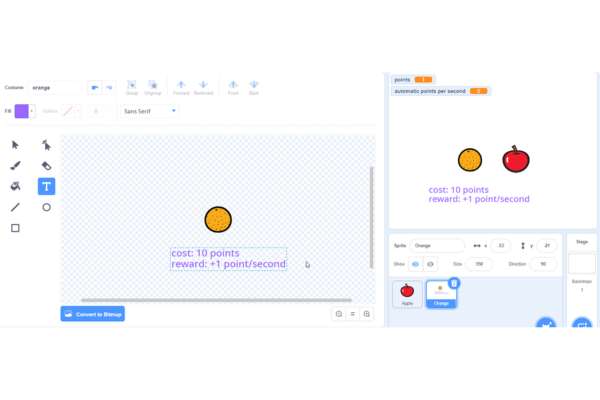
- Click on “Costumes”.
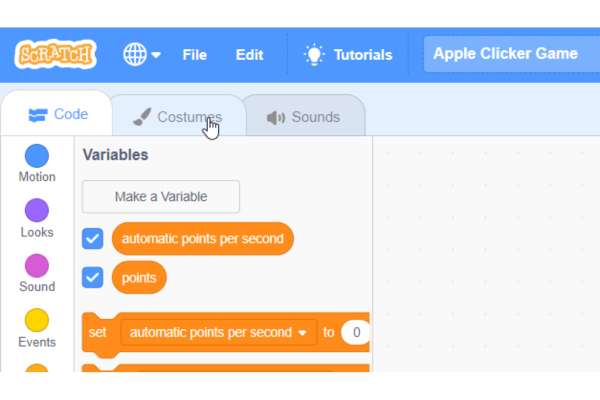
- Click on the “text” tool.
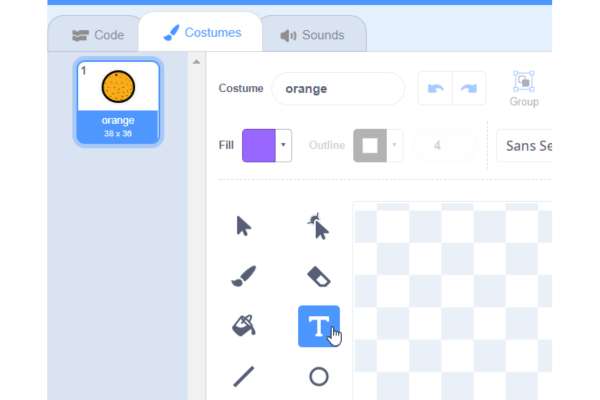
- For more convenience, zoom out.
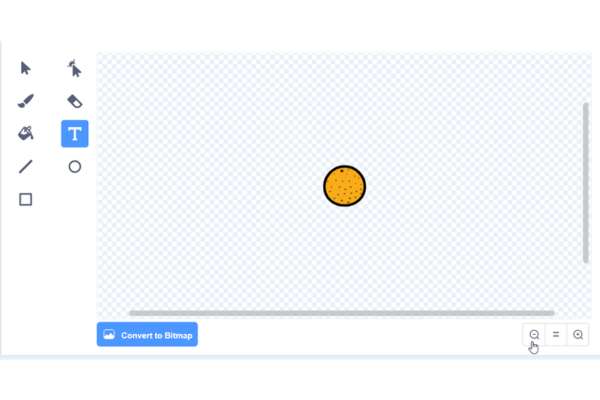
- Let’s put the cost of the Orange at 10 points and let’s also write down how many points per second it will give you once you buy one.
- Set the cost to 10 points and the reward to +1 point/second.
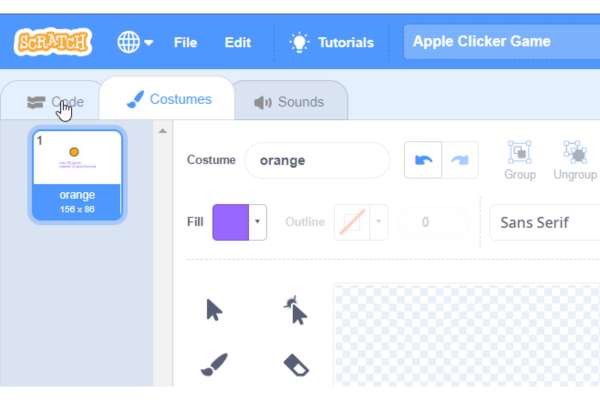
- Let’s go back to the code tab.
- Click on “Code”.
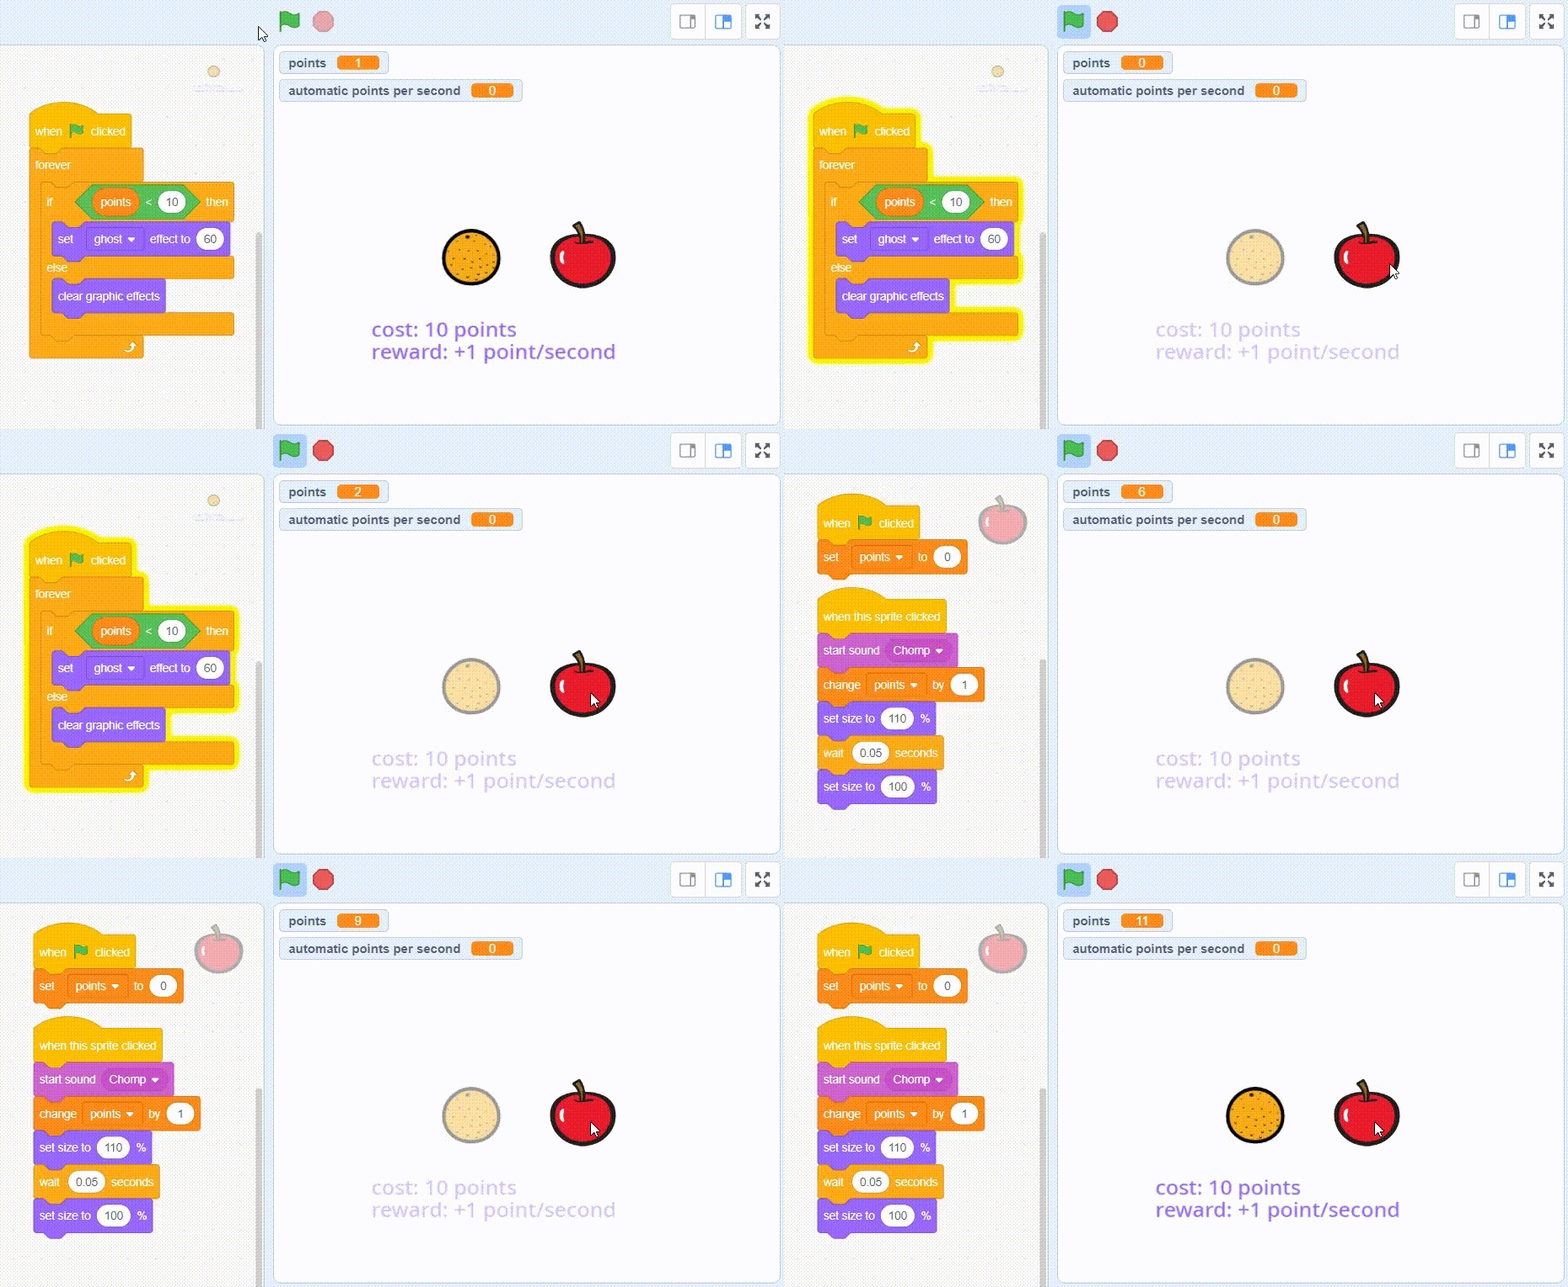
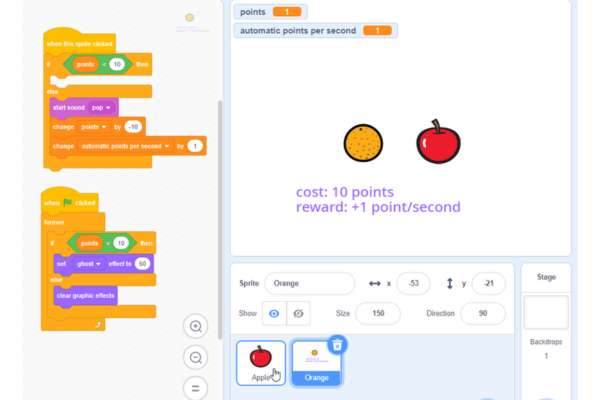
- If you have less than 10 points, make the orange appear greyed out because you cannot buy it yet.
- From the looks category, drag & drop “set color effect to” and select “ghost”.
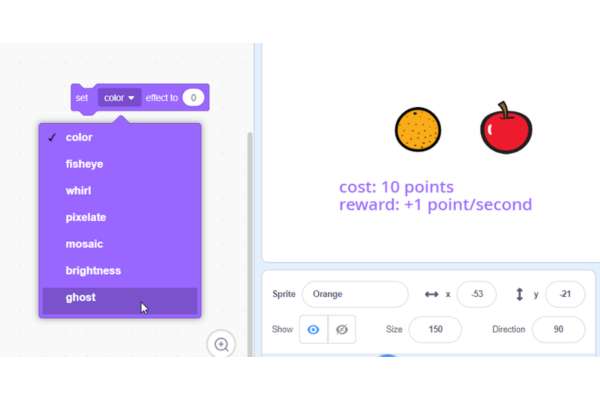
- Set the ghost effect to 60, it makes a sprite look transparent or faded.
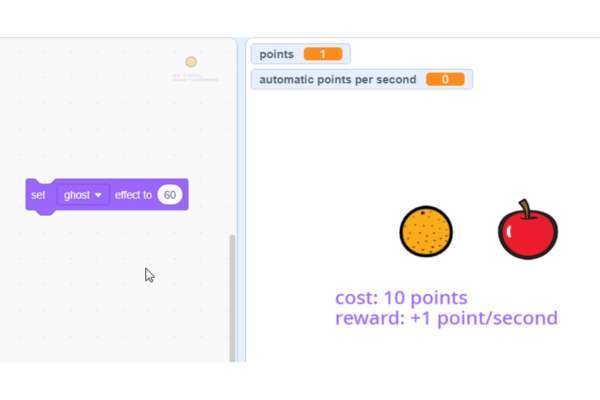
- Add “clear graphic effects” will make a sprite look normal.
- Drag & drop “clear graphic effects”.
- Click on “set ghost effect to” and “clear graphic effects” blocks.
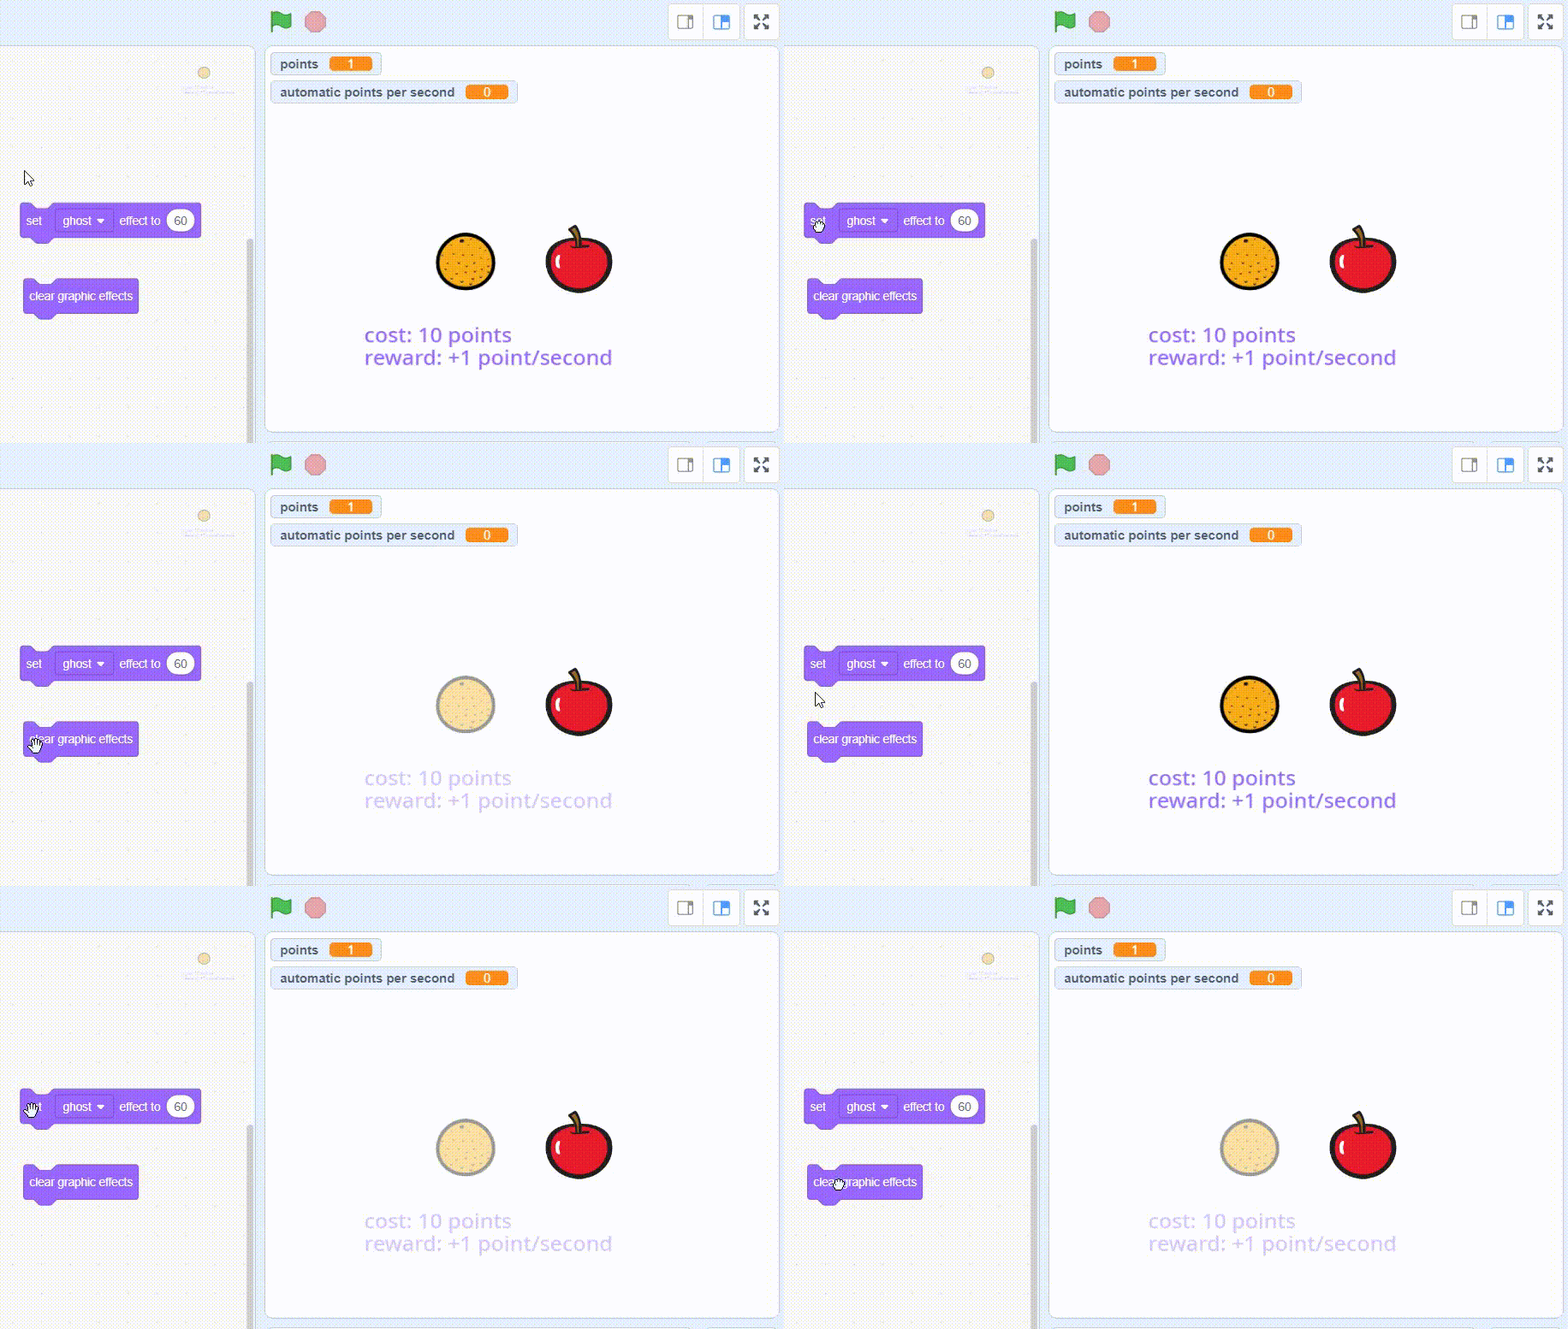
- Set the ghost effect to 60, and make the Orange sprite appear faded (grey) if the points are less than 10. Otherwise, use the “clear graphic effects” block and make the Orange sprite appear normal.
- Drag & drop the if-then-else block.
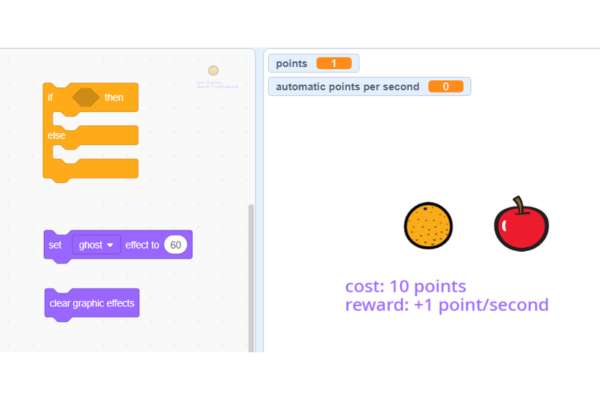
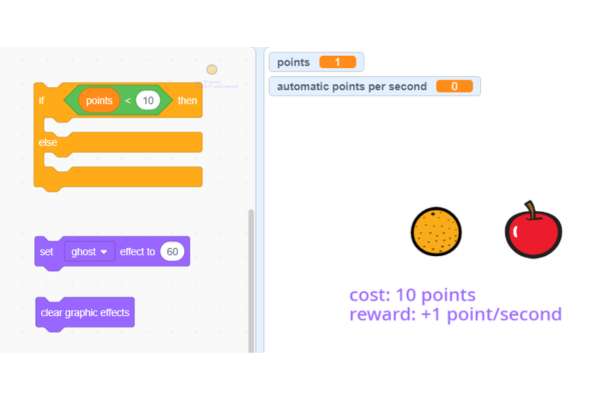
- Add a “less than” block, and set up a condition if “points < 10”
- Drag & drop the “less than” block and set its value to 10 and add the “points” block
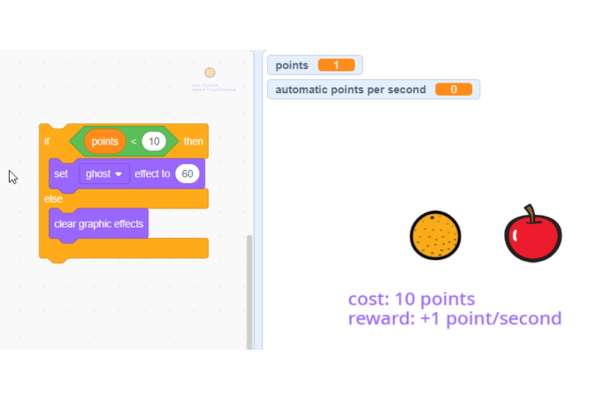
- Drag & drop “set ghost effect to” block to if and “clear graphic effects” to else as shown below.
- Put the above code inside a “forever loop”, and put a “when green flag clicked” block on top.
- Now you can see if you have less than 10 points the orange appears faded. Otherwise, the orange appears bright.
- Let’s program what should happen when you click on the orange.
- Drag & drop the if-then-else block.
- Drag & drop “when this sprite clicked” block on top.
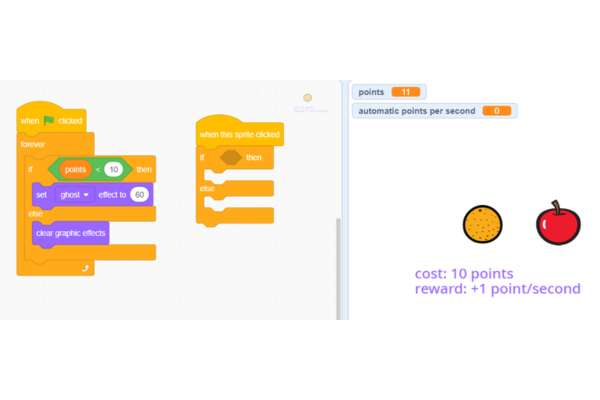
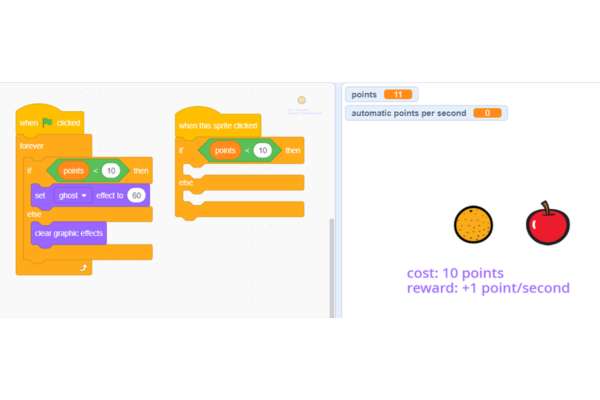
- Add a condition to detect if points are less than 10.
- If you have less than 10 points, nothing will happen because you do not have enough points to buy the orange yet.
- So, you can just leave this part of the “if-else” block blank. However, if you do have 10 points, then…
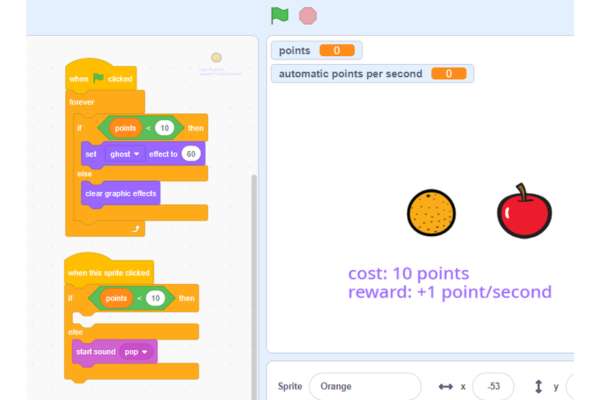
- Well, let’s set up a trigger to play a sound.
- Drag & drop the “start sound” and “pop” blocks to the else part.
- Click on the “green flag”.
- If you don’t have 10 points yet and you try to click on the Orange, nothing will happen, but when you get 10 points, you can click on it and it will play a sound.
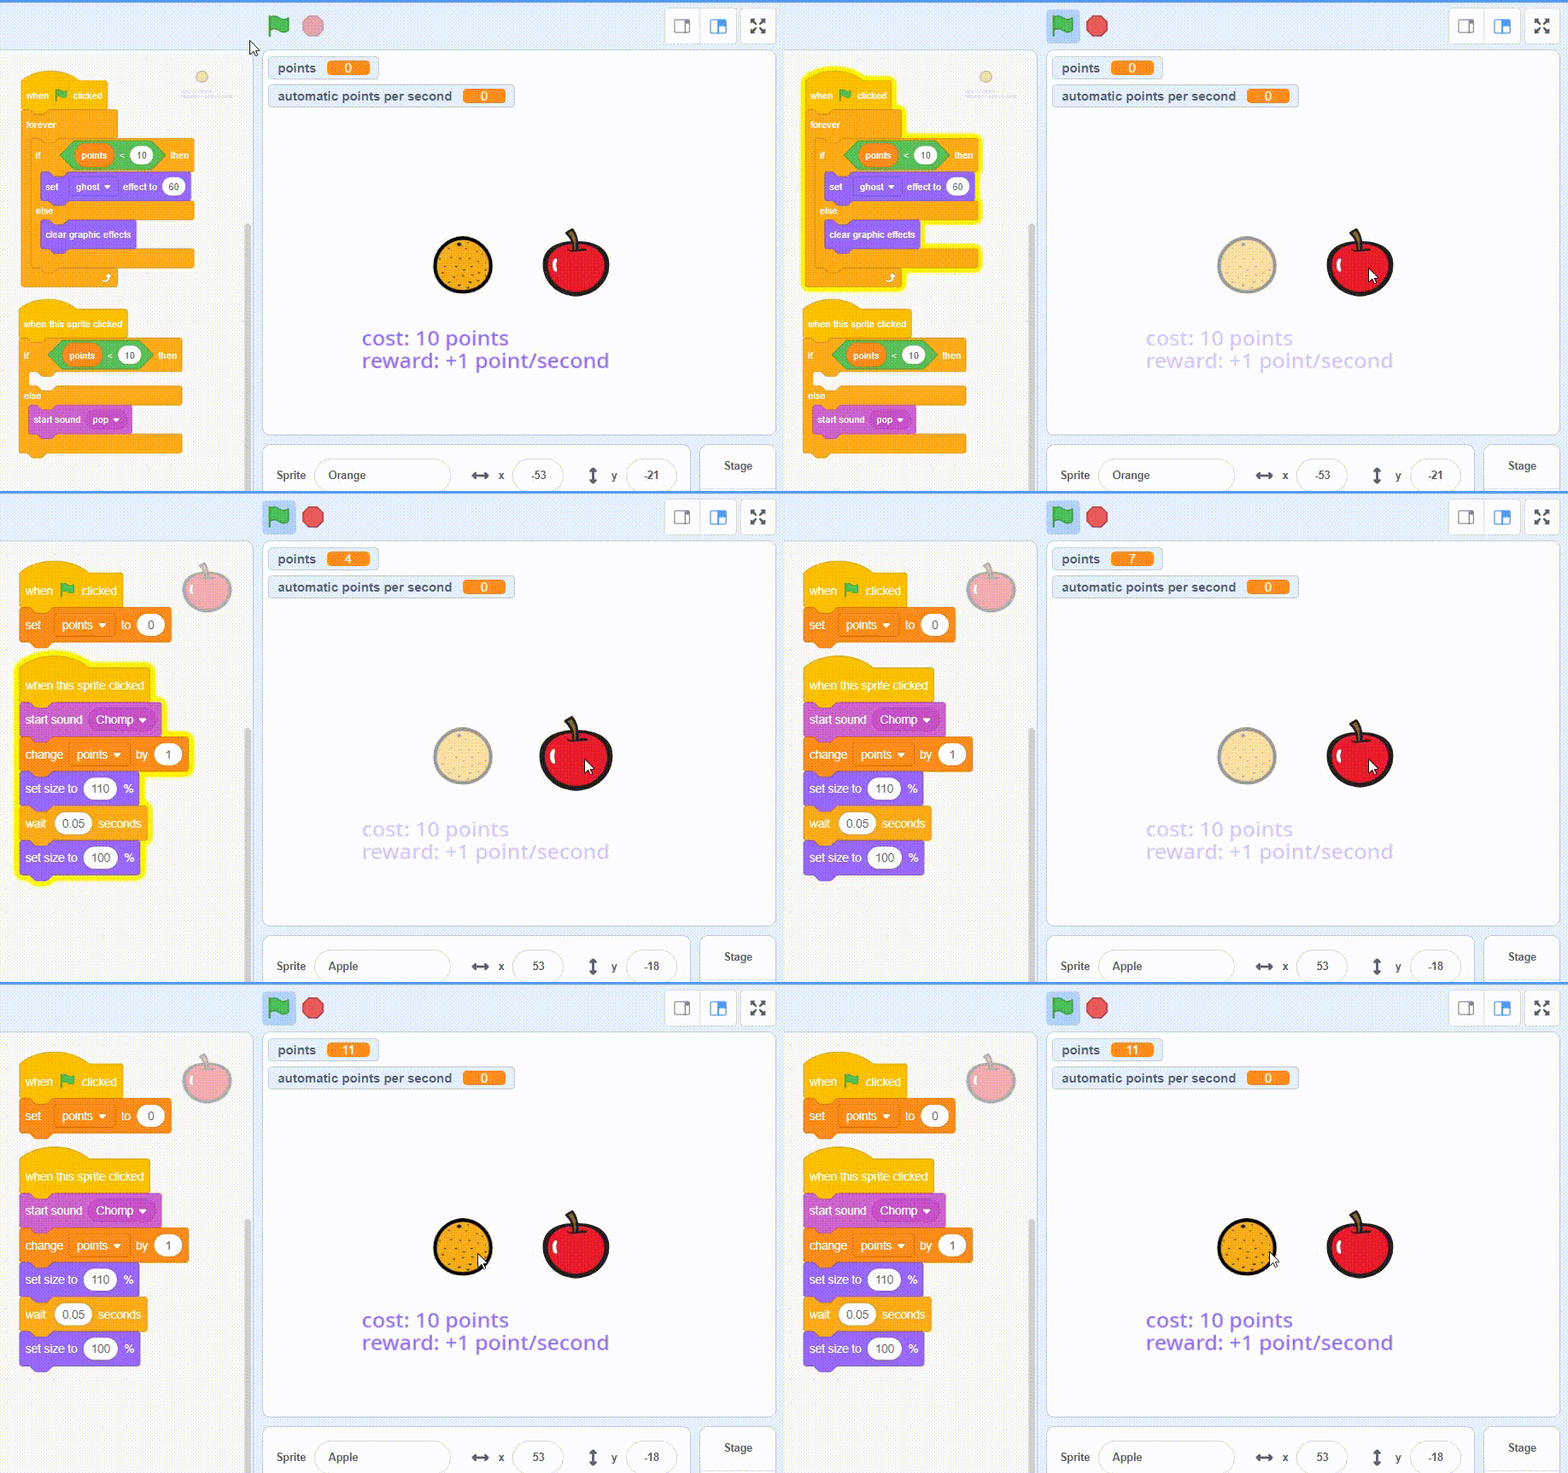
- Let’s set up a condition, what else shall happen when you successfully buy an Orange?
- When you successfully buy an Orange, it should take away 10 points from you.
- Set “change points by” block by -10.
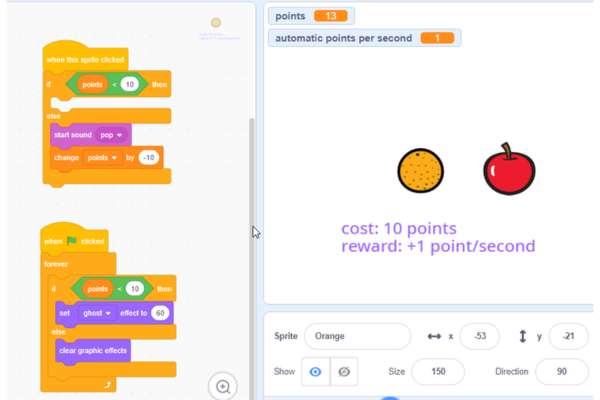
- Set up a rule that the Orange will start giving you an automatic point every second after every 10 points.
- Drag & drop the “change automatic points per second by” block as shown below.
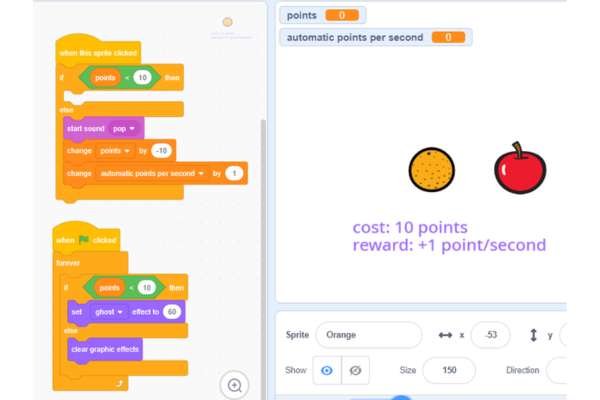
- Click on the “green flag”.
- Now, click on the Orange and buy it, it’ll decrease your points because you spent the money and your automatic points per second went up, this variable went up. But if you don’t do anything, if you don’t click you will not get any automatic points per second.
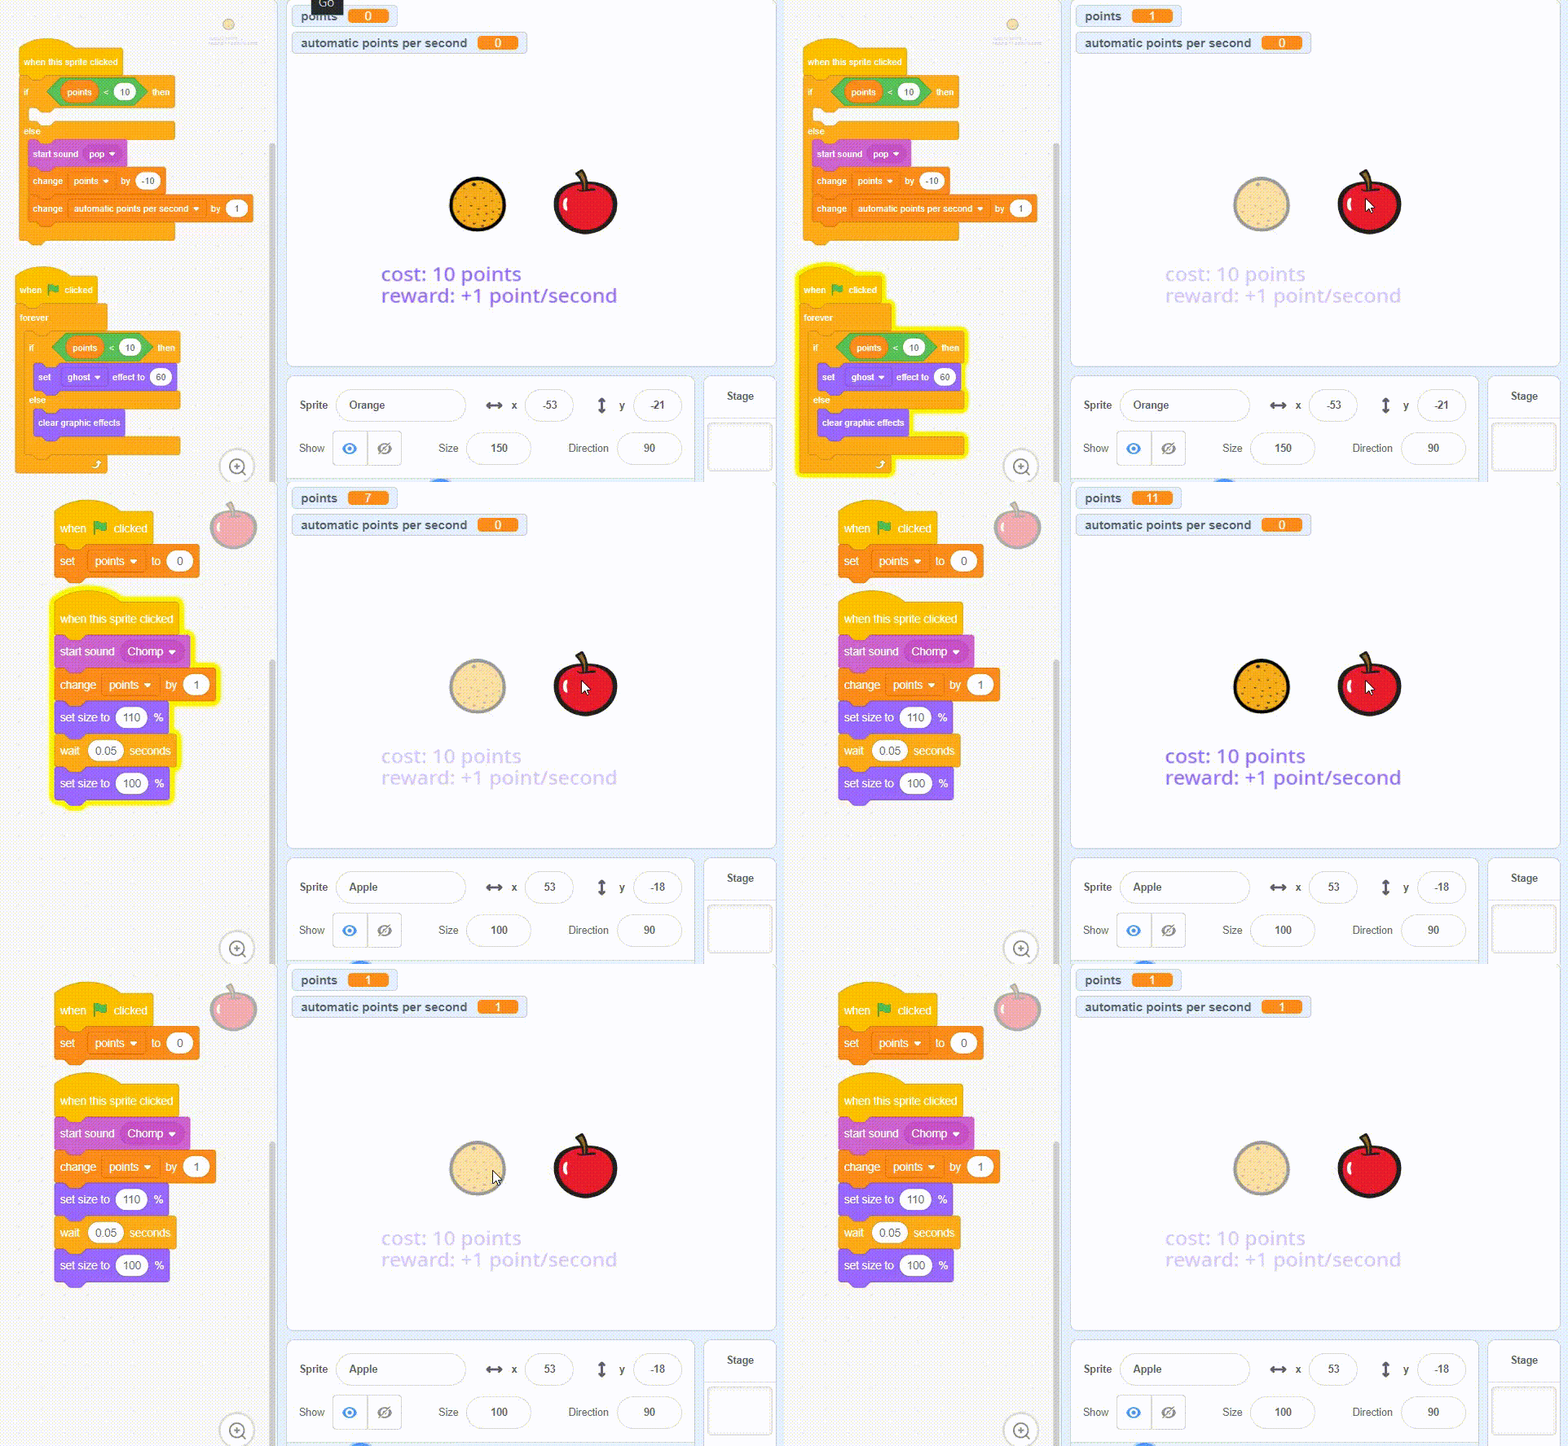
Step 4. Add automatic points
The next level of our game is to add automatic points. The detailed steps on how to do this Scratch editor are explained below:
- Click on Apple sprite.
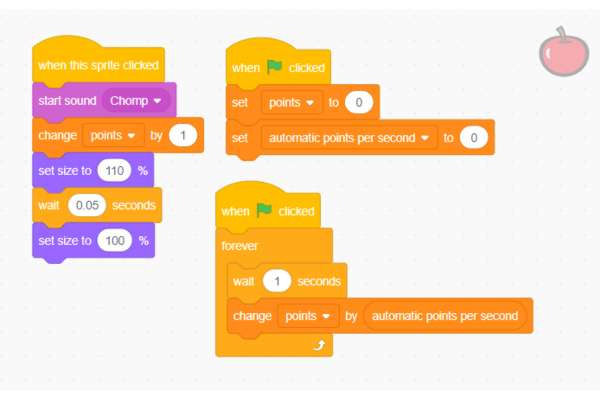
- Drag & drop “wait”, “change points by”, “forever”, and “when green flag clicked” blocks as shown below,
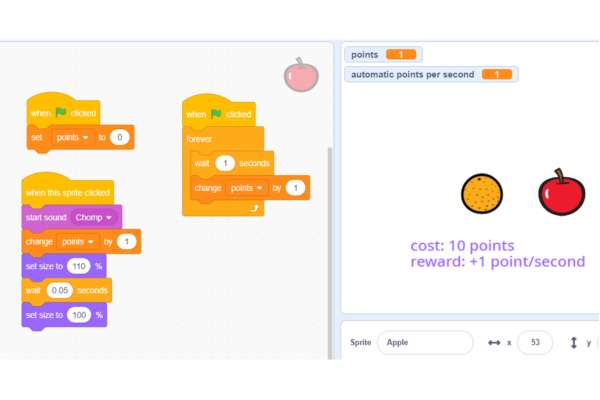
- Click on the “green flag”.
- What happens when the blocks “when the green flag is clicked”, “forever wait one second” and “change points by one” are clicked?
- Okay, this makes your score increase by one every second because it waits one second and then adds one to your points. Even if you’re not clicking.
- But let’s say you buy two oranges.
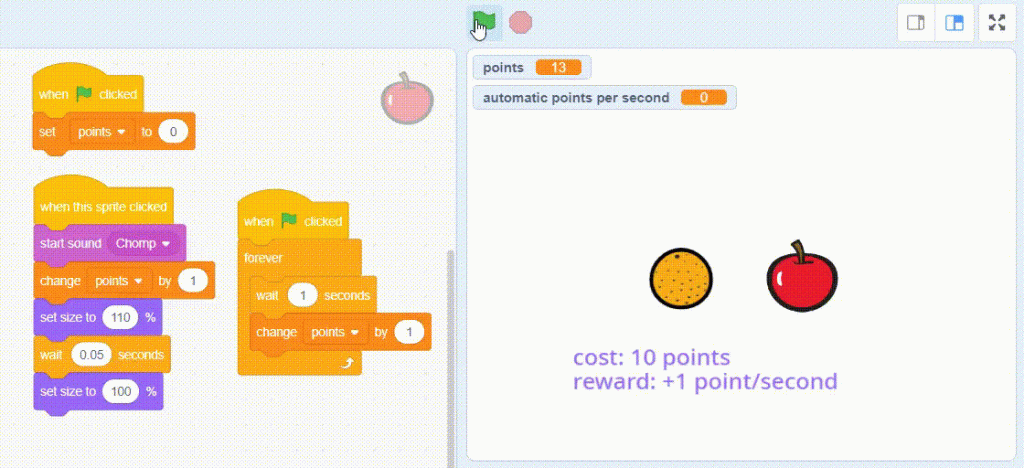
- Now, you should be getting two points every second. And if you have three oranges, you should be getting three points every second.
- Instead of changing point variable value by one, you can just drag & drop “automatic points per second” to “change points by” blocks.
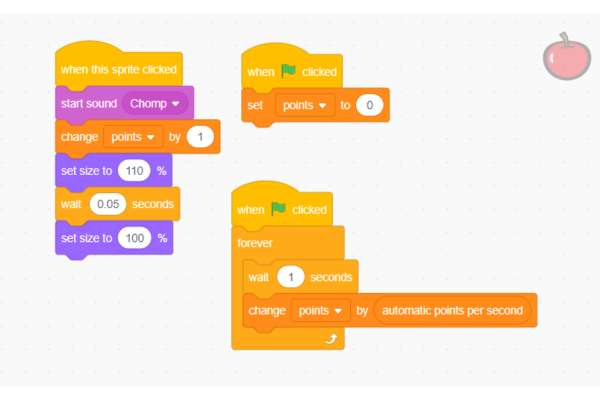
- Also, when the game restarts, the “automatic points per second” resets at zero.
- Drag & drop the “set automatic points per second” variable to “set points to” blocks and set its value to 0.
- Click on the “green flag”.
- Here, you can see that if you’ve gotten automatic points per second up to three, you’ll get three points every second.
- Similarly, if you’ve got it up to a thousand, you’ll get a thousand points every second.
Congratulations! you have now created the apple clicker game in Scratch!
Looking to learn Scratch coding? Explore Wiingy’s Online Scratch Coding Classes For Kids to learn from top Scratch coding experts.
FAQs on apple clicker game on Scratch
How to make a clicker game on Scratch?
A clicker game on Scratch can be made in 4 easy steps by following the steps given below:
1. Create a clickable object [sprite]
2. Create a purchasable object [sprite]
3. Set the game cost and reward rules
4. Add automatic points in the Clicker game
What are some of the simple games on Scratch?
Some of the simple games you can create on Scratch are maze games, dodging games, platform games, and puzzle games.
What is the most popular game on Scratch?
The most played game of Scratch is Paper Minecraft v11.6 (Minecraft 2D) with over 35000 hearts.
Creating Scratch games can be both fun and educational. It might seem daunting at first but if you remain motivated and consistent the process can be quite rewarding. We hope the above tutorial has helped you in creating a clicker game on Scratch. If you want to create some more fun Scratch games, then read our blogs on different types of Scratch games like maze game, space invaders game, etc!

